*** This version of Confluence is for testing only and contains a copy of content from June 29th 2026. No changes will be preserved. ***

 Joanna Elizabeth Cerro, last updated on Jun 24, 2021
4 minute read
Joanna Elizabeth Cerro, last updated on Jun 24, 2021
4 minute read
1. Begin in the Invoices app.
2. Search the vendor invoice number in the search box near the top of the lefthand pane.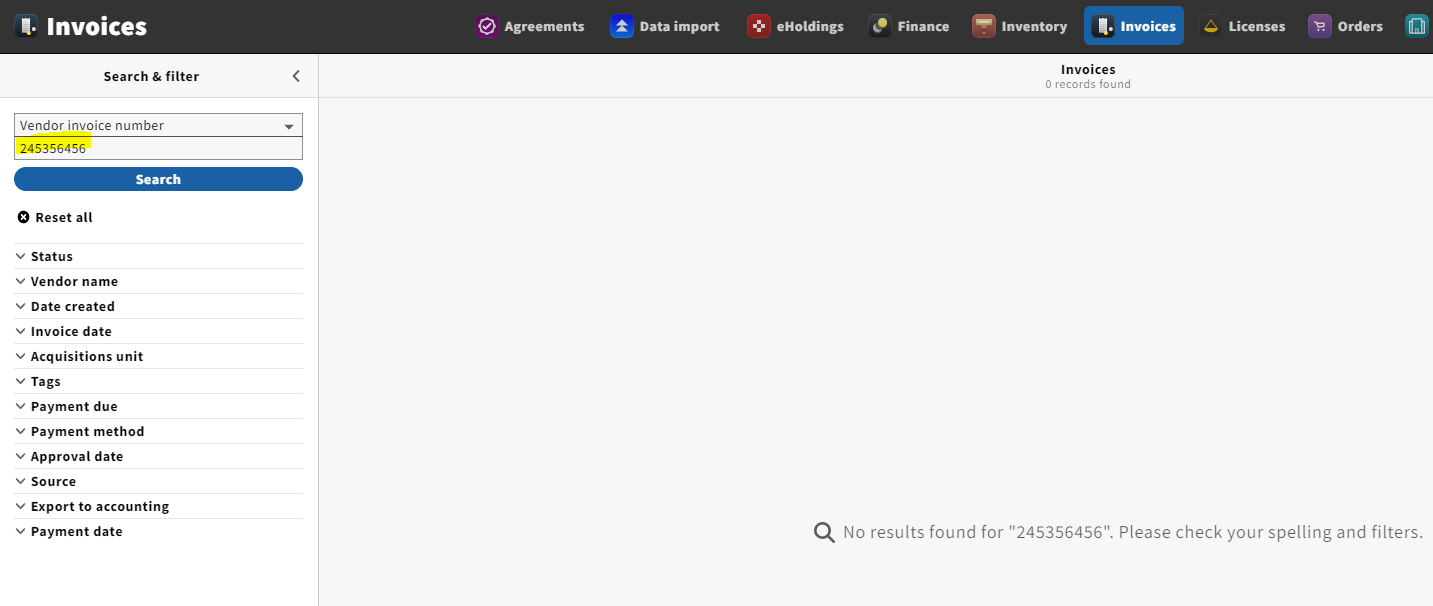
3. After confirming that the payment has not yet been made, click New in the upper-righthand corner of the screen.
4. Enter information into the following fields: Invoice date, set status to Reviewed if you plan on submitting the invoice immediately after processing it, Bill to name.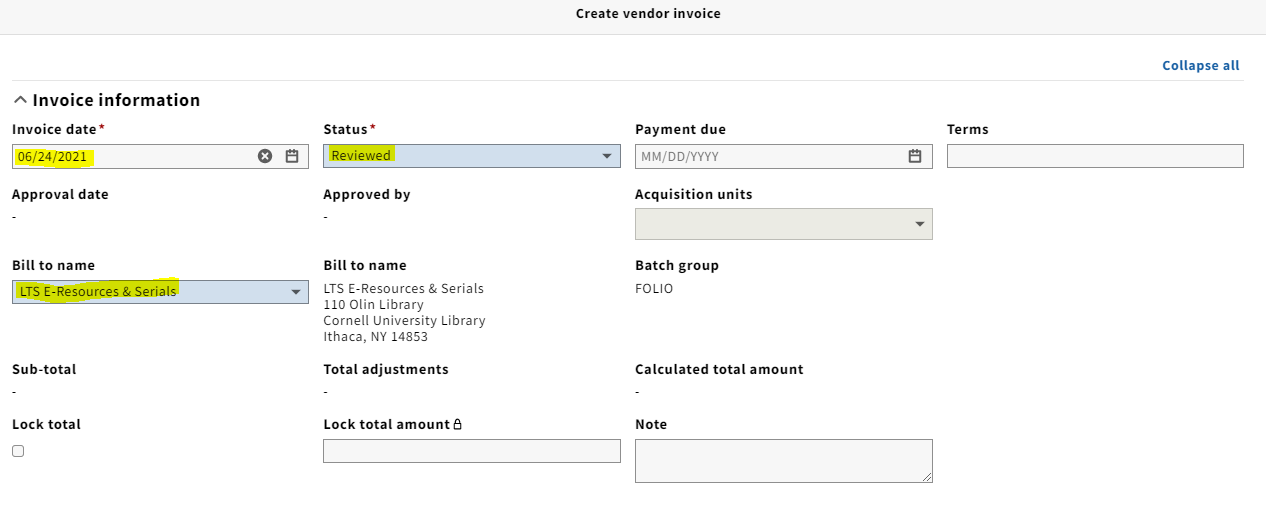
NOTE: The Lock total box on your header is a feature that we will use when loading EDI invoices. This will “lock” the total of the invoice line items that appear on the invoice, and will override what the price is on the POL. With this box checked, if the totals don’t match the invoice will not be able to be approved for payment. As we know, many EDI invoices are loaded without the adjustment (i.e. Shipping/service charge/discounts etc.) which would throw the totals off. Your invoice total in FOLIO should match your paper invoice total you are working from.
5. Enter any shipping and/or service charge information you might have under Adjustments. You will be entering these adjustments at the invoice level, rather than the invoice line level. You will be using the same funds for shipping (999) and service charge (515) as we did in Voyager. Under the Pro rate drop-down menu, always select Not prorated. Under the relation to total field, you almost always want to select In addition to. Make sure the Export to accounting box is checked.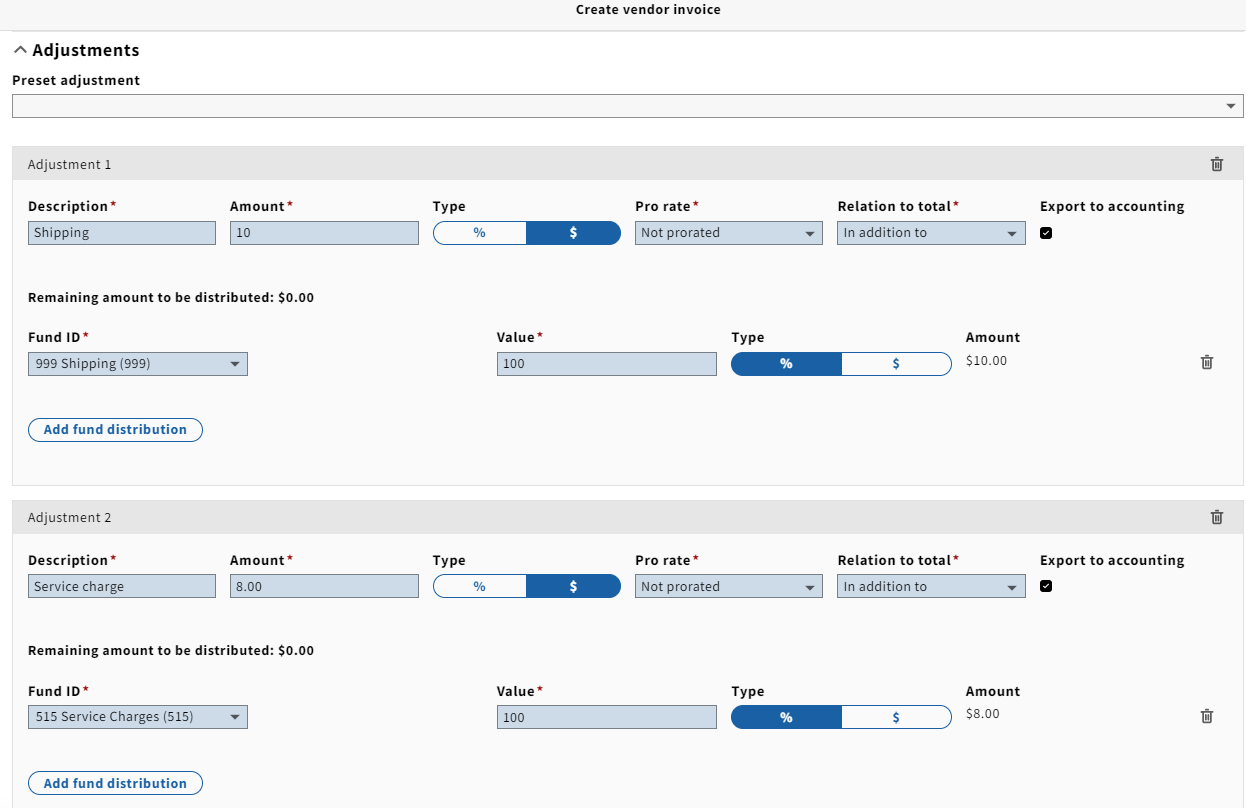
NOTE: We will be using the same practice of not adding shipping costs or service charges to one-line invoices as we did in Voyager.
6. Under Vendor information, fill in the invoice number, and click Organization look-up to select the appropriate vendor.
7. Under Extended information, select the invoice payment method. You should always select Physical check, unless you've paid using a pcard. If paying by physical check, make sure that Export to accounting is selected. If paying with pcard, you'll want to leave this box unchecked. Check subscription overlap will be toggled by default, which is how you will want to leave it. Always use US Dollar as currency.

8. On the pdf copy of the invoice, use the add text feature in Adobe to add your LTS Receiving stamp in the following format:
LTS Receiving
Initials
Date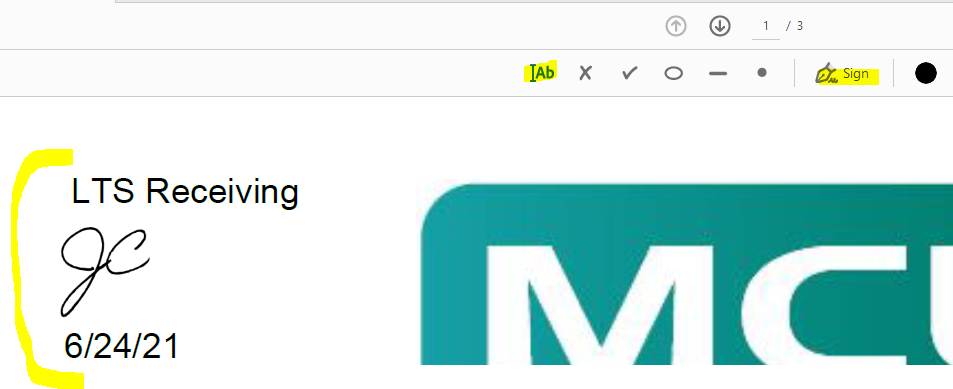
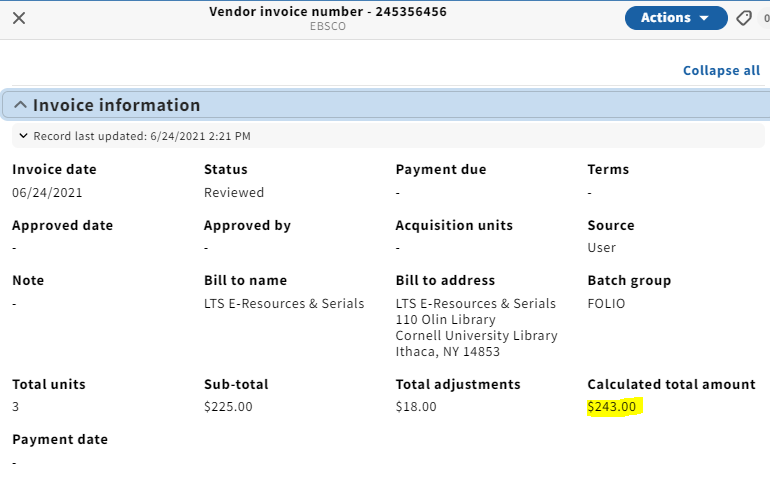
Upload a copy of the invoice and any approval information by dragging them to the box under Links & documents or select or choose file.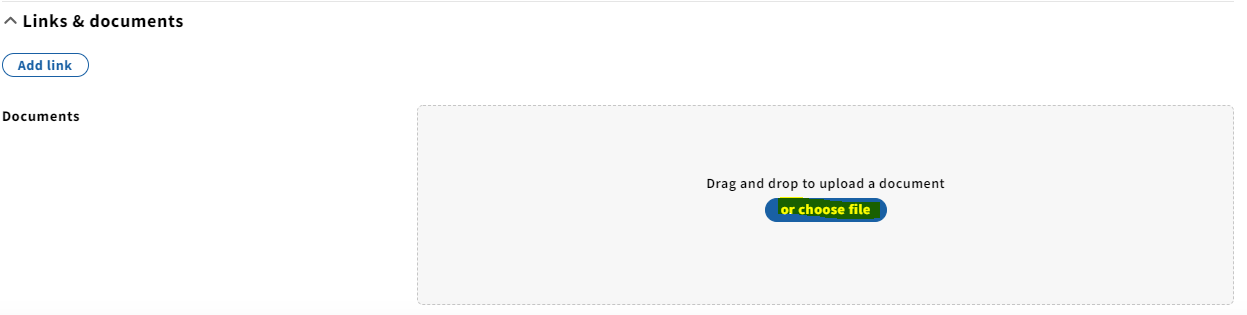
9. Click Save & close at the bottom.
10. Select Add under Invoice lines.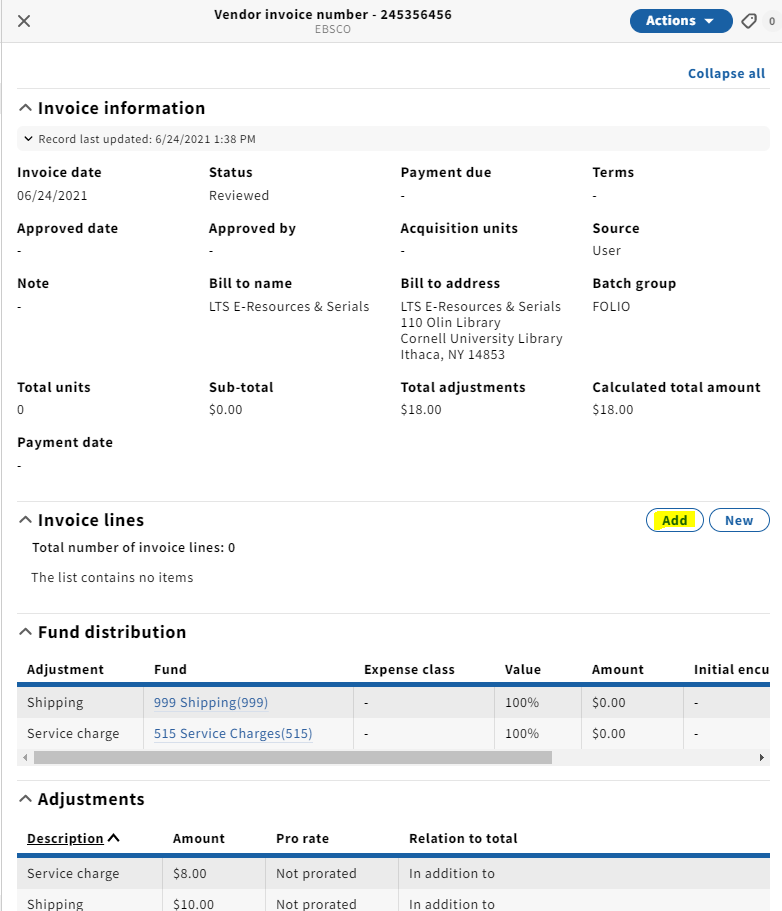
11. A pop-up will appear where you can search for an order line by title or PO#. After you've identified the order line, click the checkbox next to the PO# and click Save.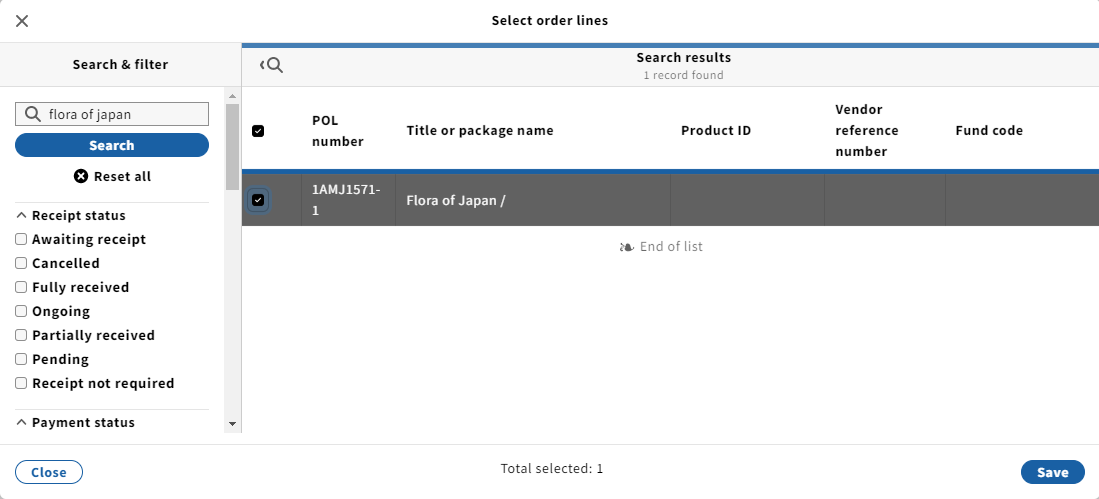
12. The Invoice lines field will now be populated with the title you just selected. Next, click on the invoice line.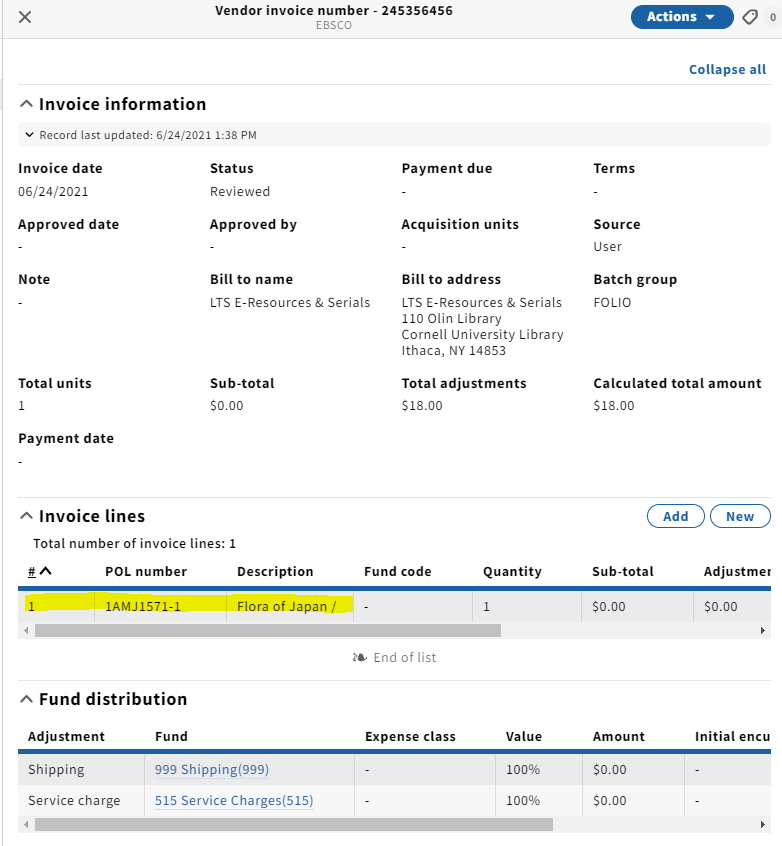
13. Select Edit from the Actions drop-down menu.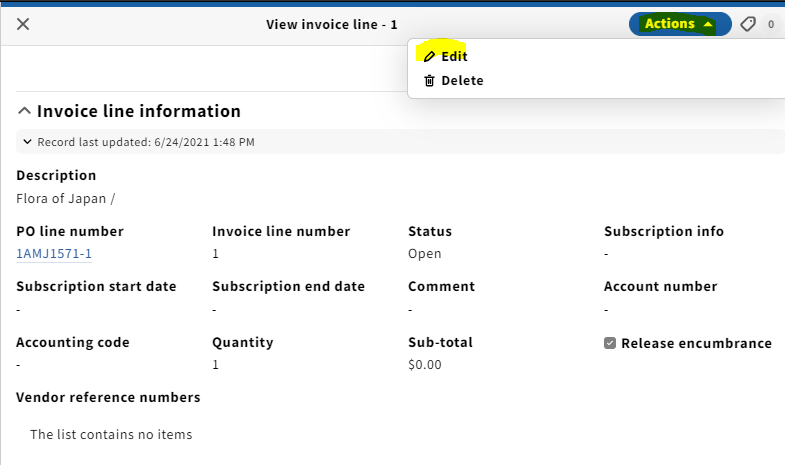
14. On the Invoice line information edit screen, fill in the following information:
- Subscription info: P for print, E for electronic, P+E for both
- Subscription start and end dates
- Comment: fill in volume or enumeration info in this field
- Sub-total: the cost of that particular line item (as stated above, if this is a single-line invoice, you will include shipping in this field similar to our practice in Voyager)
- Fund distribution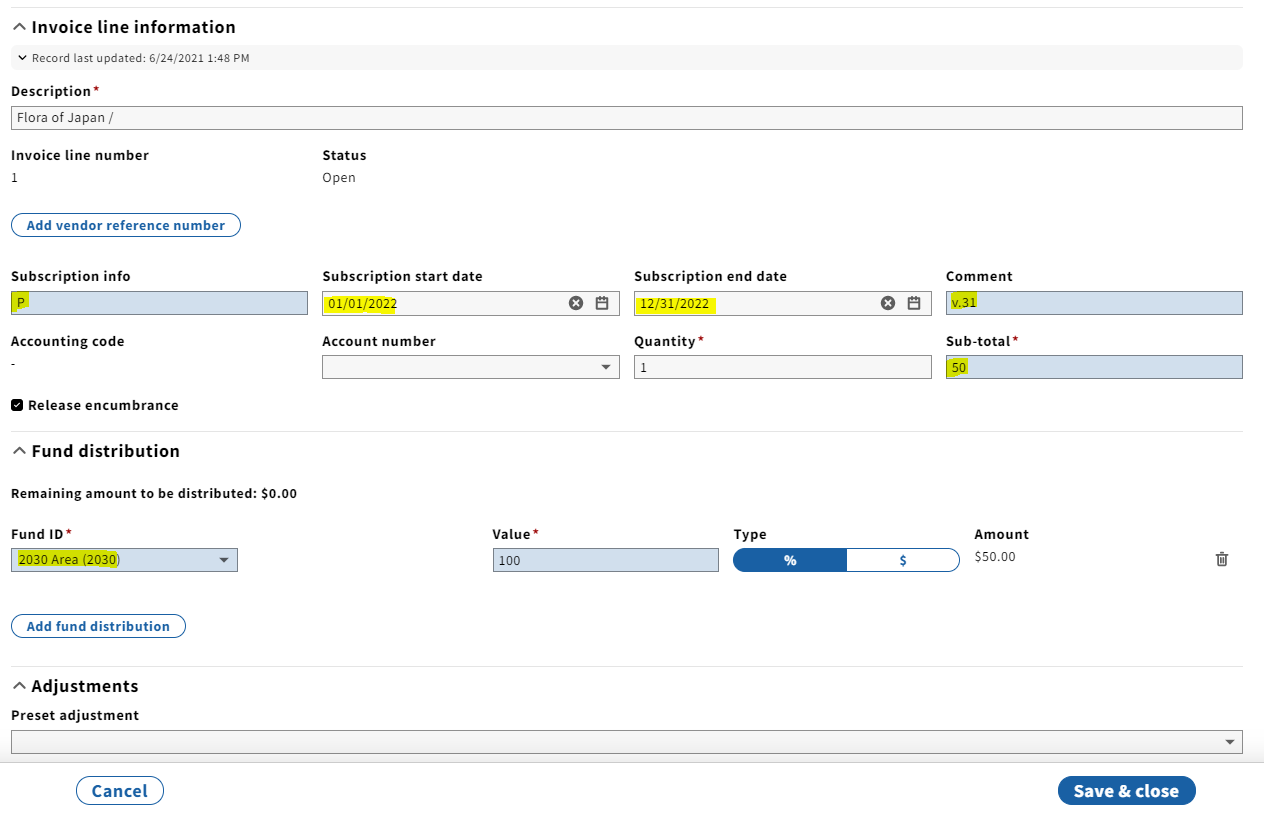
15. Click Save & close.
16. If adding more invoice lines, repeat steps 10-15 for each item.
17. Note that when you pay for an e-resource, you will be selecting Electronic Resource - perpetual under Expense class in Fund distribution. This replaces the -01 suffix that we used in Voyager.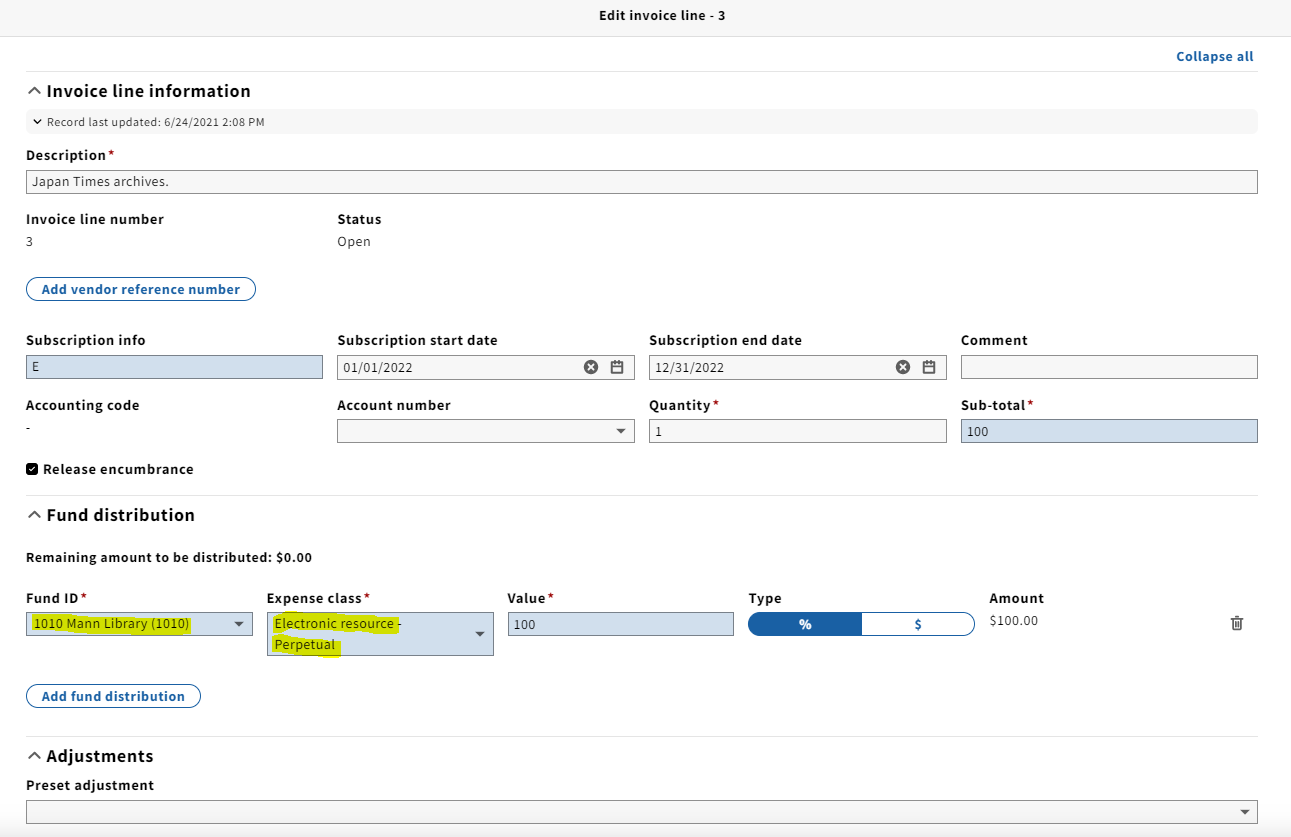
18. Double-check to make sure that the Calculated total amount matches the total on the invoice.