For mobile development, there are two servers, the prod server, and the test server. Make sure to switch the server URL to the proper value in {{dev-mobile/lib/helper/API.dart}}.
There are two parts to this onboarding process: front-end and back-end. For the front-end part, it takes around 2 hours to complete. The goal is to locally build and run the iOS app on the simulator/Xcode and test the App on your phone using Testflight. For the backend part, it takes around 2-3 hours and the goal is to build the container and try to access both the prod and test servers.
FRONT-END
Getting Started
In order to run the mobile app locally, follow the steps below:
- Install Xcode from App Store
- Install Flutter
- Use the response from ``flutter doctor`` to guide you through any other necessary installations (e.g., Android Studio, Chrome, CocoaPods, etc.)
- We currently do not support the Android version of the App but it’s necessary to have Android Studio installed for Flutter to function properly.
- If you encounter the "Bad CPU type in executable" error with ``flutter doctor``, maybe this would help
- If you have trouble installing Cocoapods with ruby, try installing with ```brew install cocoapods```
- Pull the frontend-mobile repo from https://github.com/DIAPER-Project
- For local testing and development, use the test server by switching the server URL to ``https://mobile-test.diaper.cf:5001/api`` in ``dev-mobile/lib/helper/API.dart``.
- Note: the server URL may get updates in the future, please refer to the infra team/documentation for the new server url.
- Once ``flutter doctor`` yields no error, proceed with the following steps in https://flutter.dev/docs/get-started/editor to build and run the app
- Navigate to the ``dev-mobile`` directory.
- Simulation (two ways)
- You need to first open the iOS simulator by running ``open -a Simulator`` in the terminal and then run`` flutter run``.
- In VSCode, in the bottom toolbar, click "No Device," choose "iPhone 13" from the top drop-down menu, then run `` flutter run`` in the terminal.
- If you get a BUILD FAILED error of "No file or variants found for asset: assets/mobile_secrets.json", you need to create such a JSON file. The contents of this JSON file can be found in the DIAPER Confidential box (ask Liz for access) under "mobile secrets".
Uploading to TestFlight
For the TestFlight build, use the prod server by switching the server URL to ``https://mobile-prod.diaper.cf:5001/api`` in ``dev-mobile/lib/helper/API.dart``. Note: the server URL may get updates in the future, please refer to the infra team/documentation for the new server URL.
You will first need to open the workspace (frontend-mobile/dev-mobile/ios/Runner.xcworkspace) in Xcode.
Here are two very helpful and detailed guides.
- From flutter
- This Medium post has some more screenshots that you may find useful to refer to
You may find them confusing, and indeed not all sections in the tutorials are relevant. The only necessary steps are:
- Modify the project settings
- Follow the guide thoroughly
- Make sure the signing setting is correct.
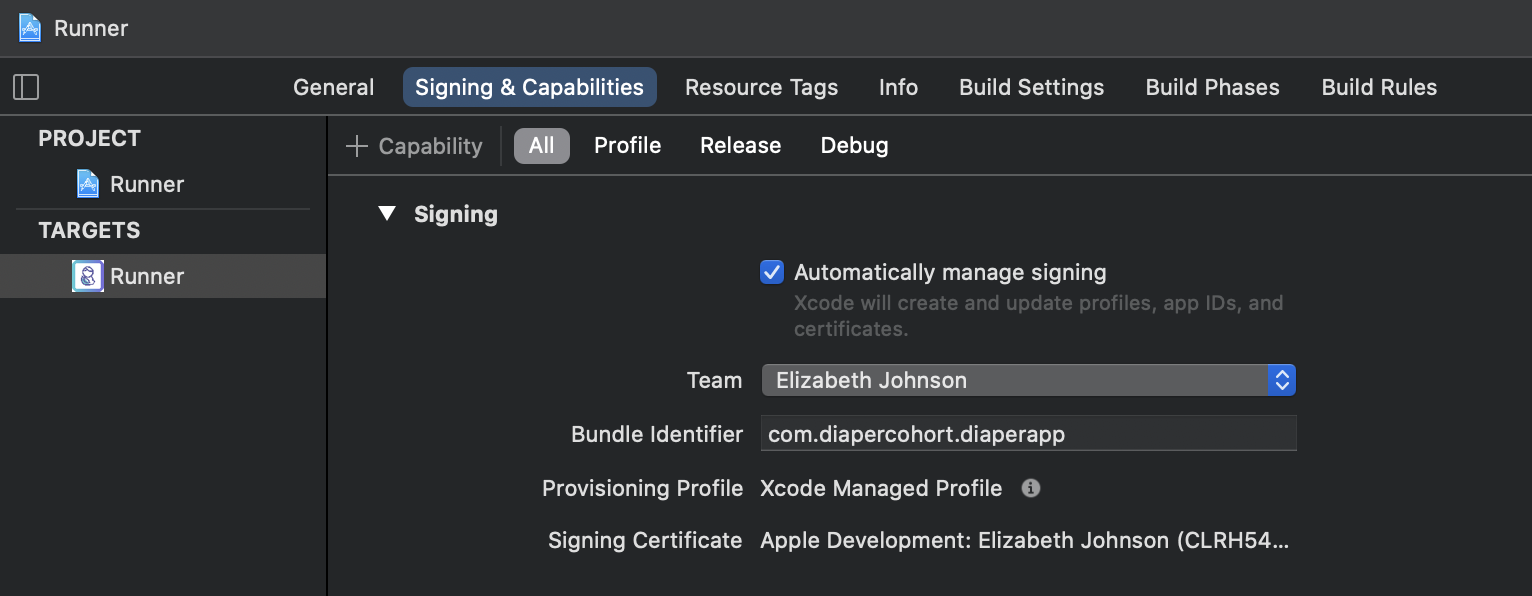
- Execute each step under the section "Submit App to TestFlight for the First time" in the Medium post.
- When building the App, set the Runner to be any iOS device.
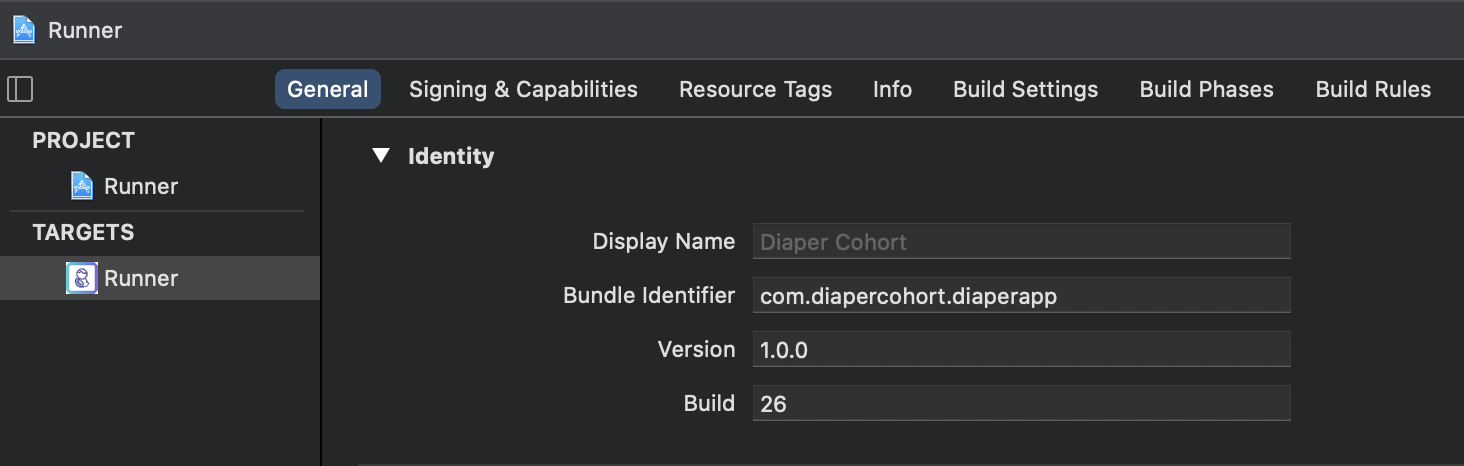
- Make sure to update the ``Build`` number to be the proper version when submitting
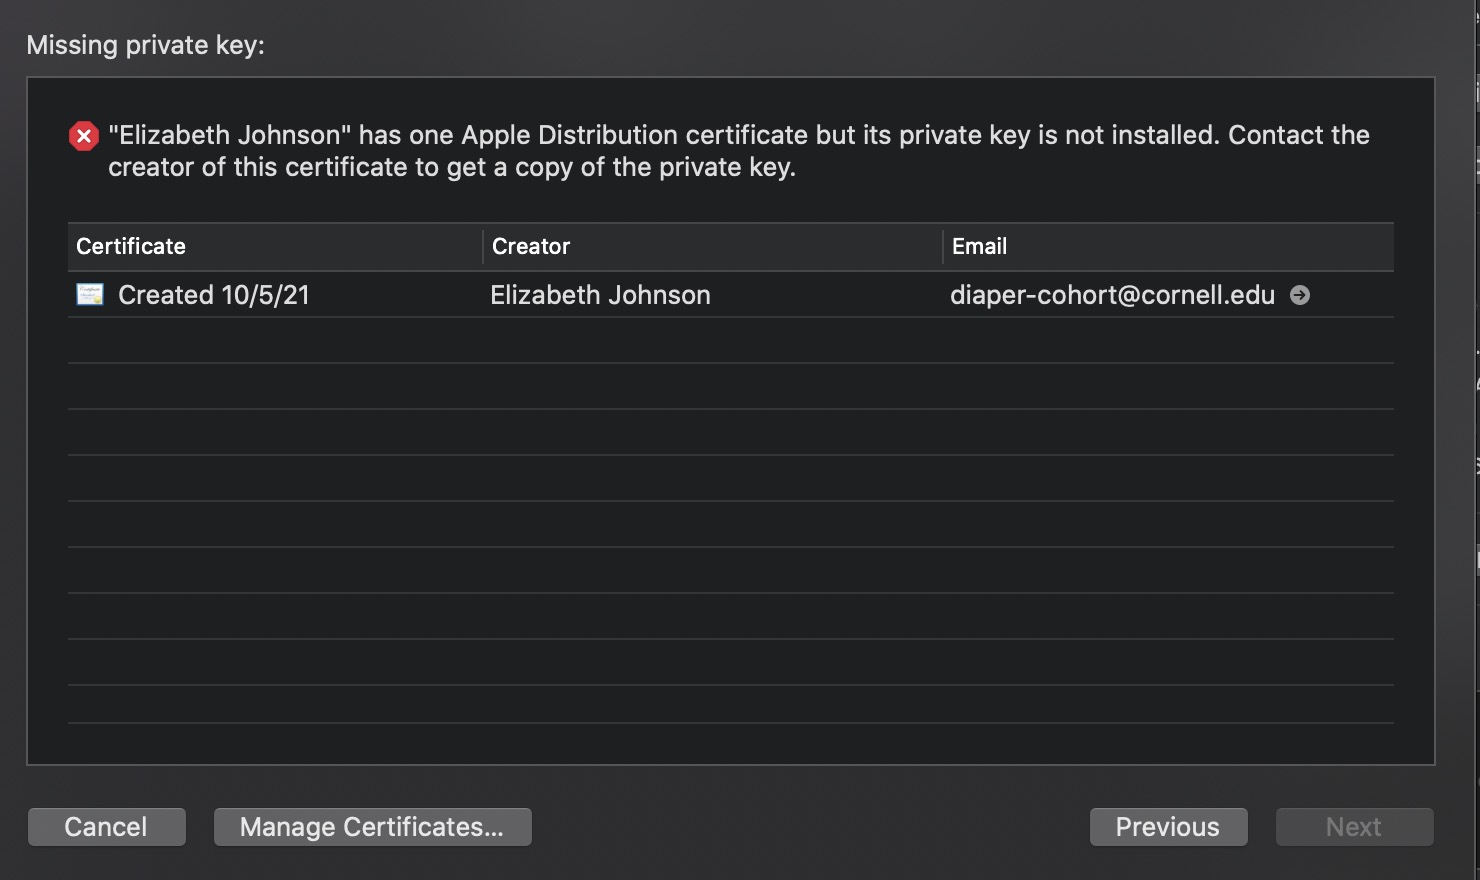
- During ``Re-sign Runner`` step when distributing App, if you encounter ``Missing private key`` error in the below screenshot, refer to Distribution certificate / private key not installed - Stack Overflow.
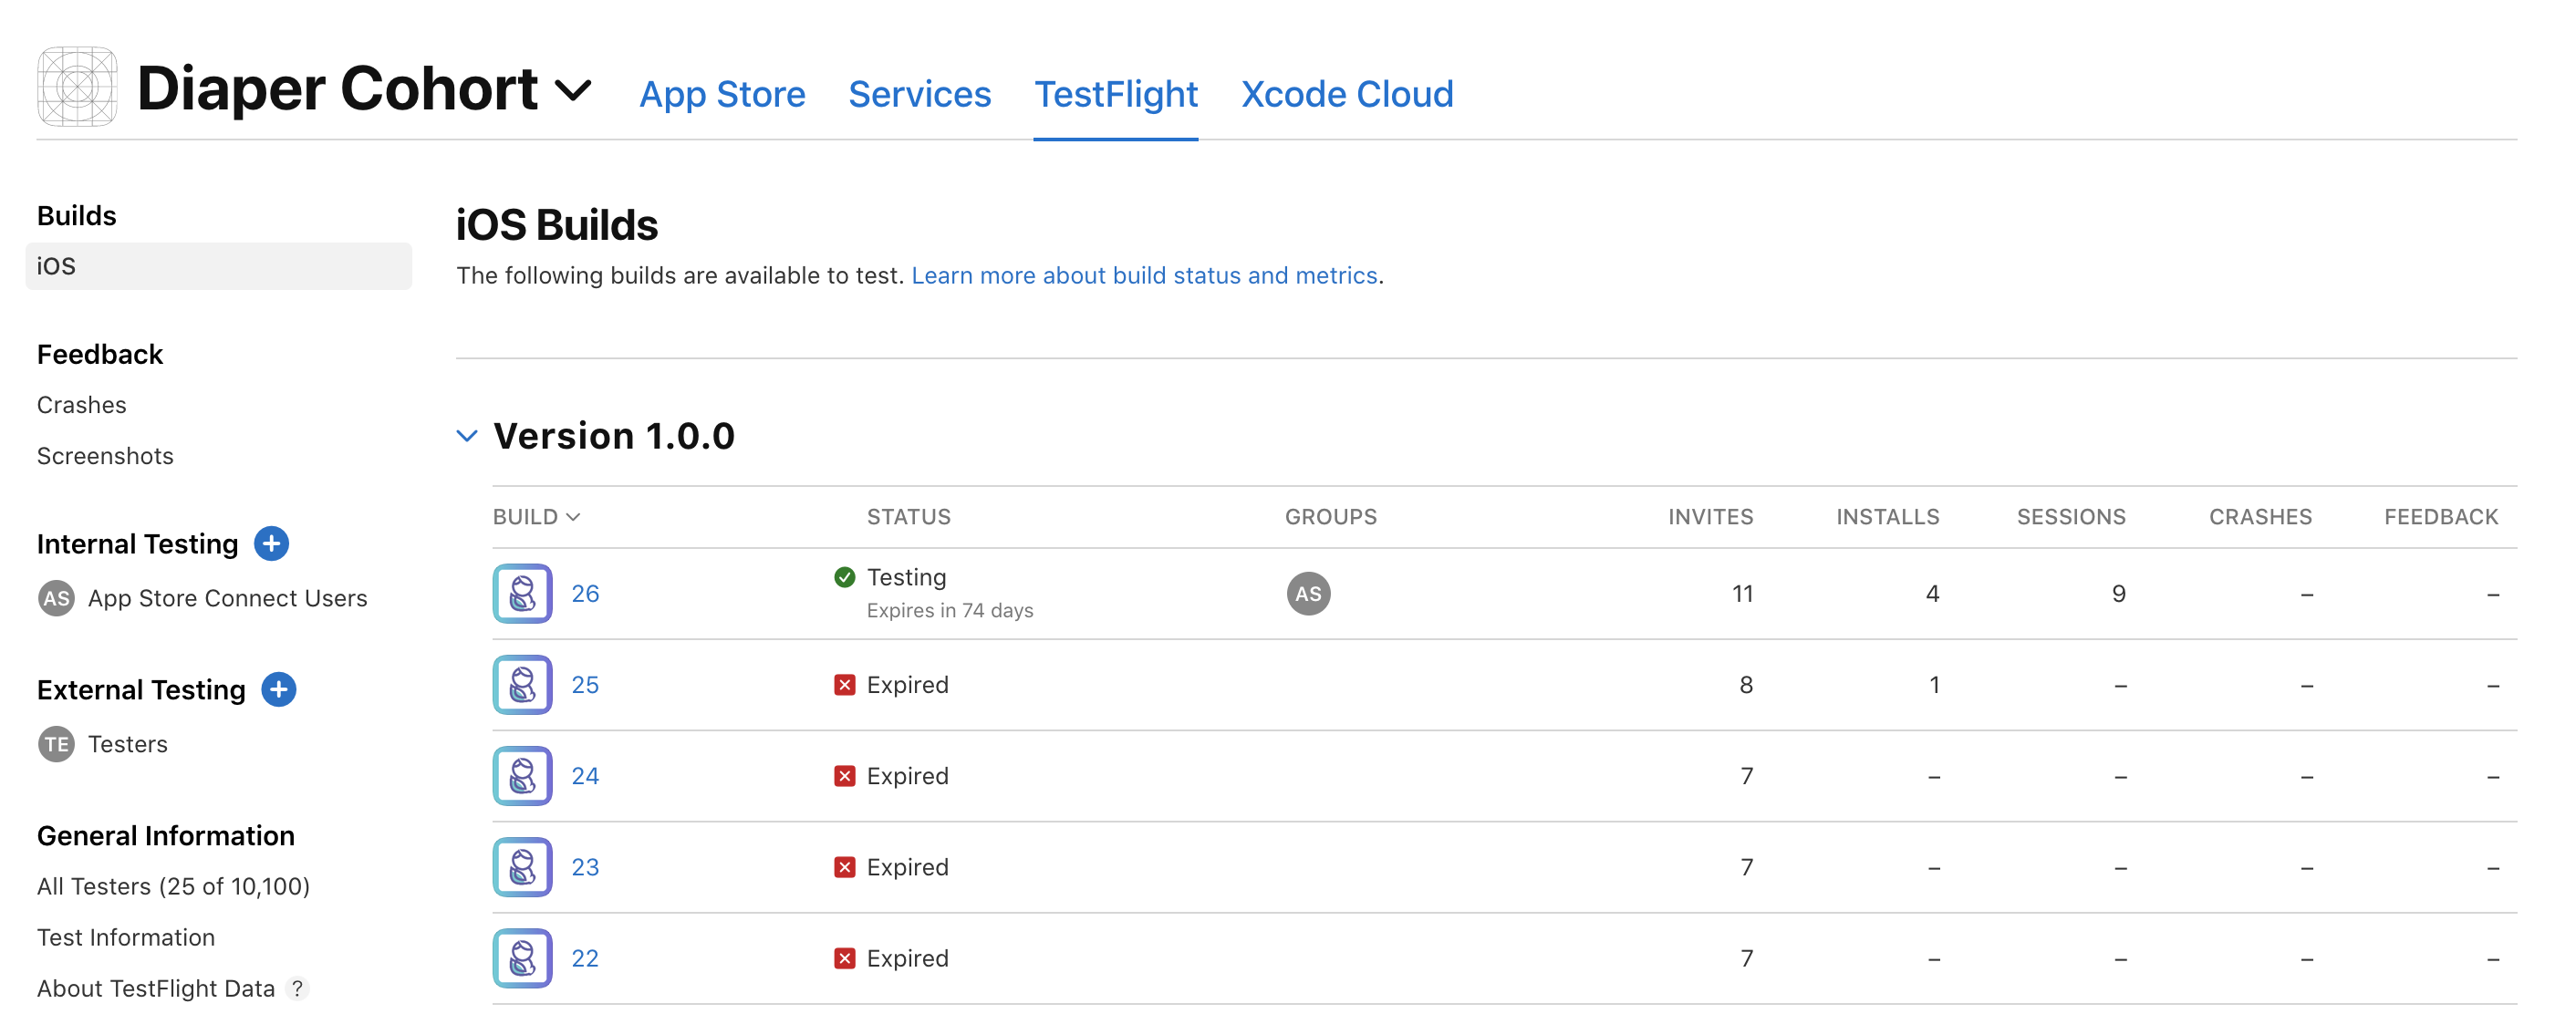
Once the app has been uploaded, go to App Store Connect and log in, you can find the new build (may take a while after uploading from Xcode) as in the screenshot.
Then, download the app TestFlight from the App store and Redeem Diaper Cohort with the TestFlight invitation code. There, you can play with your most recent build.