*** This version of Confluence is for testing only and contains a copy of content from June 29th 2026. No changes will be preserved. ***

DIAPER Cohort (mobile app) built with Flutter, flutter material, and TDesign
Before diving into codes, getting familiar with these documents is highly recommended.
Flutter Architecture | |
UI | Material |
IOS Simulator | |
Android Simulator |
In order to run the mobile app locally, follow the steps below:
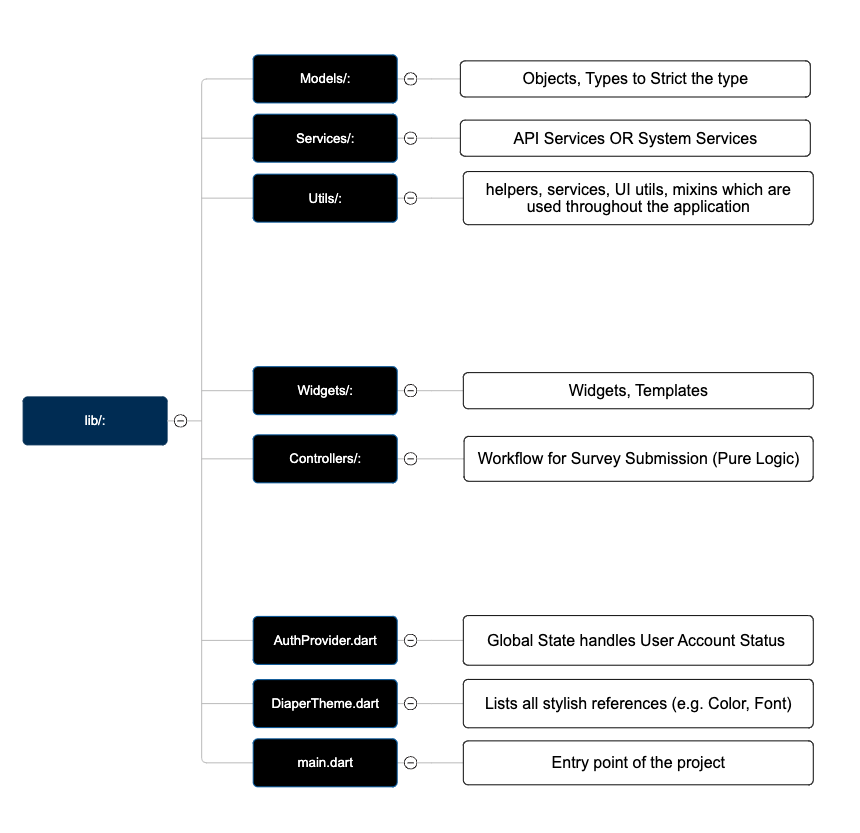
flutter doctor to guide you through any other necessary installations (e.g., Android Studio, Chrome, CocoaPods, etc.)flutter doctor , maybe this would helpbrew install cocoapods dev-mobile/lib/helper/API.dart .flutter doctor yields no error, proceed with the following steps in https://flutter.dev/docs/get-started/editor to build and run the appdev-mobile directory.open -a Simulator in the terminal and then run flutter run .flutter run in the terminal.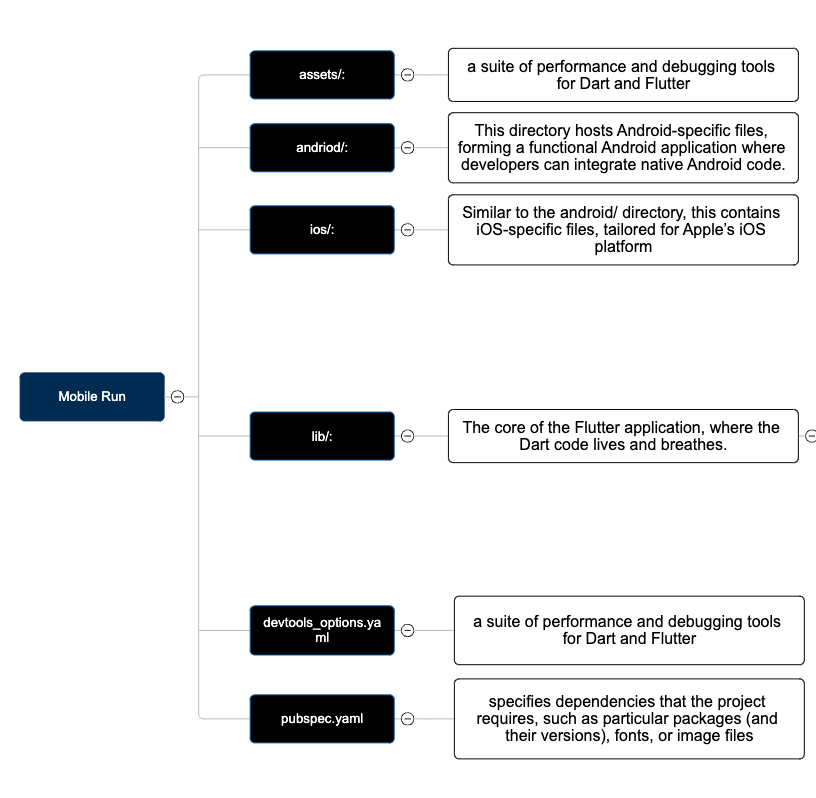
You will first need to open the workspace (frontend-mobile/dev-mobile/ios/Runner.xcworkspace) in Xcode.
Here are two very helpful and detailed guides.
You may find them confusing, and indeed not all sections in the tutorials are relevant. The only necessary steps are:
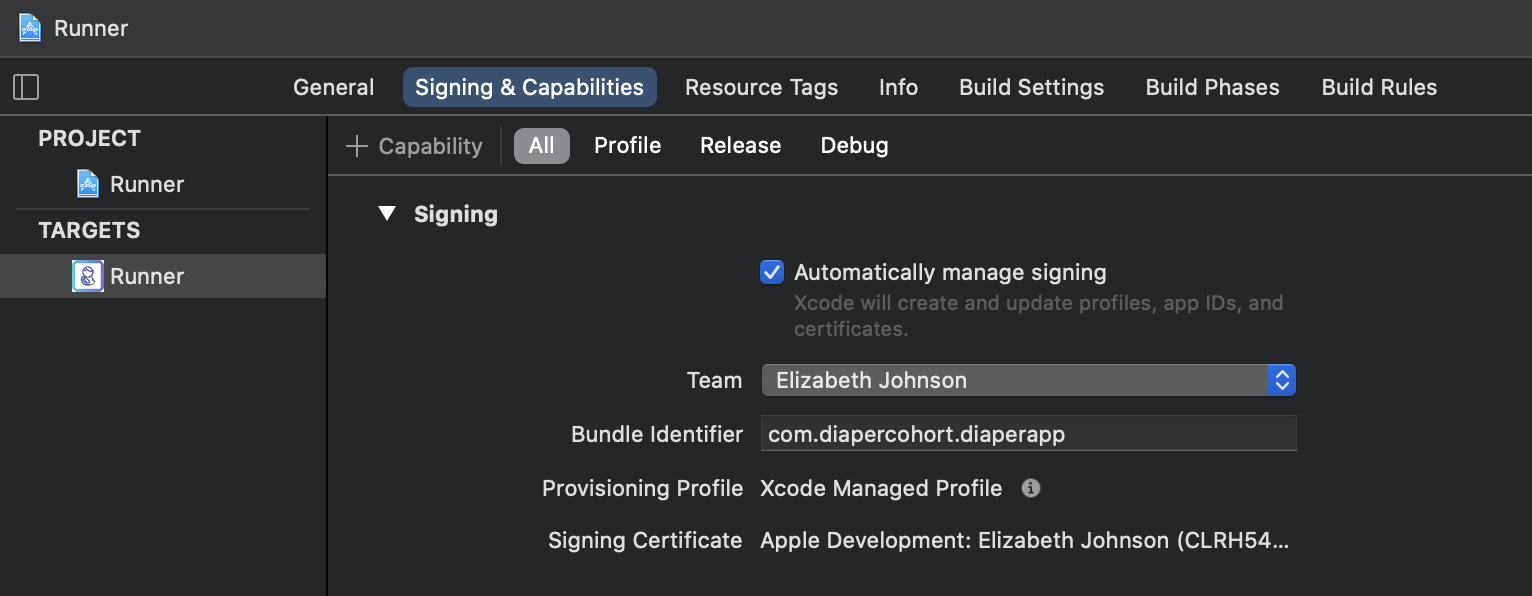
Build number to be the proper version when submitting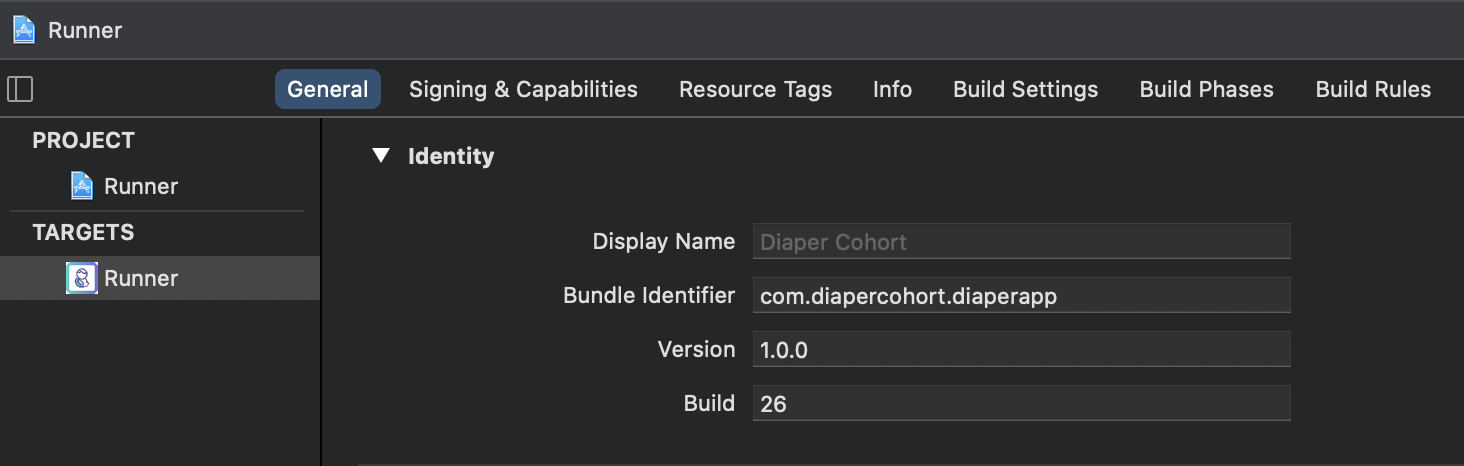
Re-sign Runner step when distributing App, if you encounter Missing private key error in the below screenshot, refer to Distribution certificate / private key not installed - Stack Overflow. 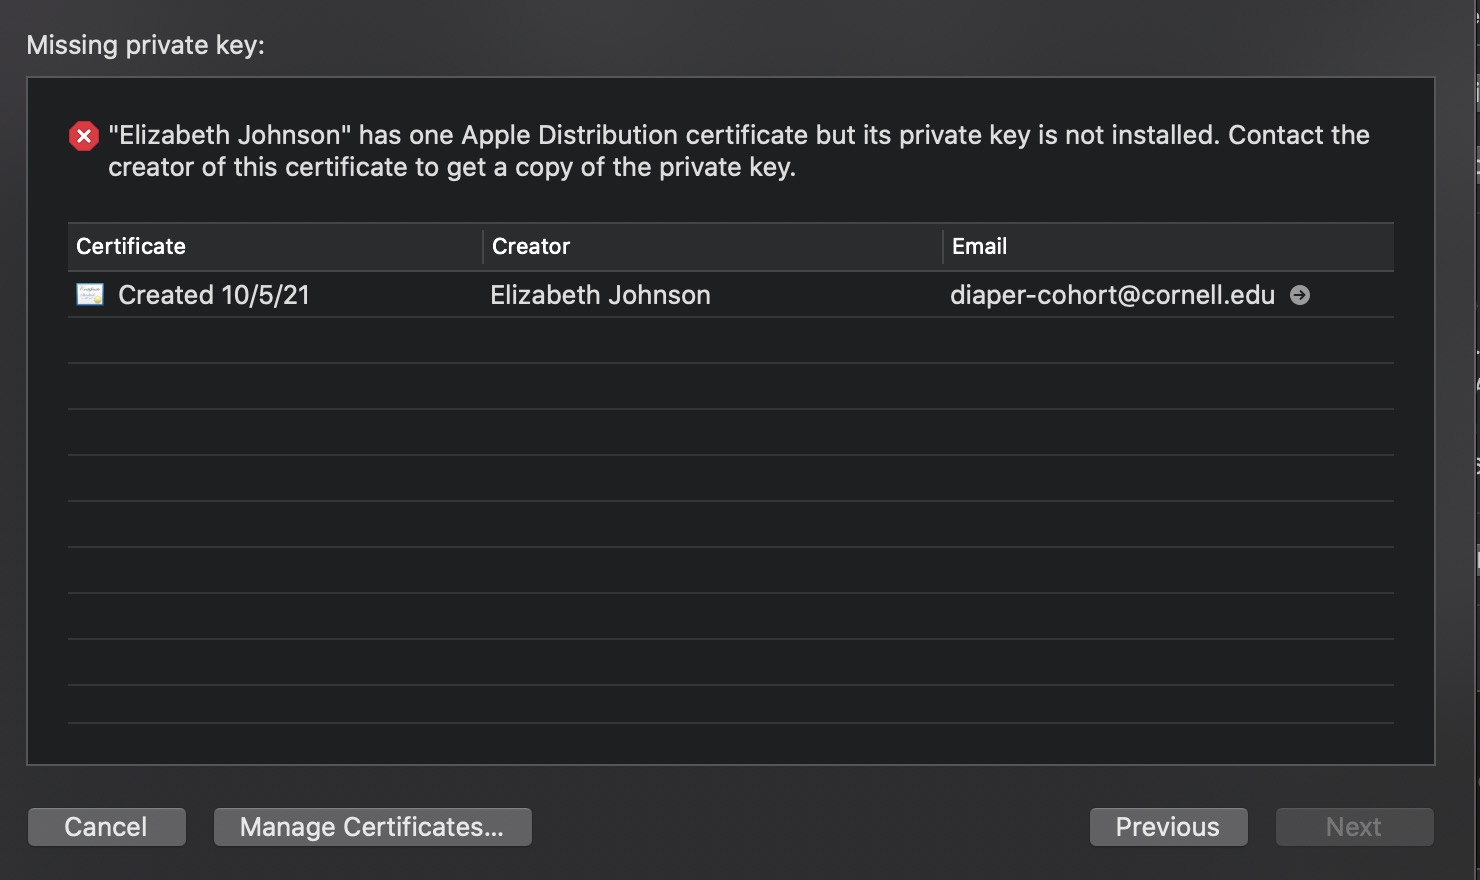
flutter.h not found, rm ios/Flutter/Flutter.podspecflutter cleanflutter runNow Archive again, the problem should be fixed.
Once the app has been uploaded, go to App Store Connect and log in, you can find the new build (may take a while after uploading from Xcode) as in the screenshot.
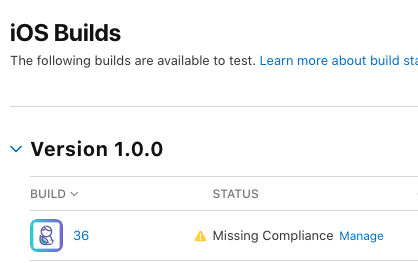
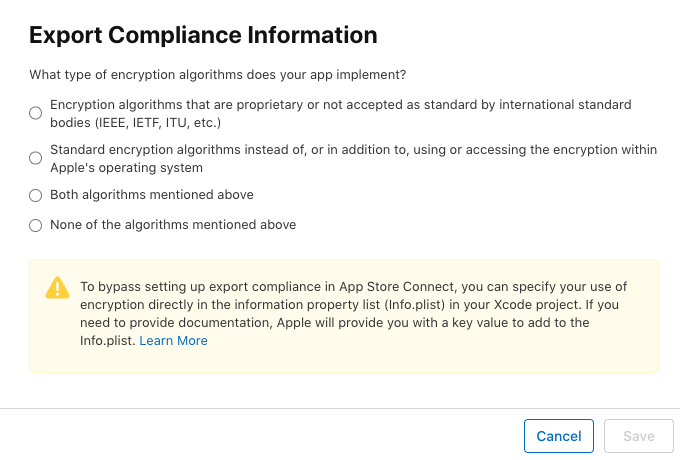
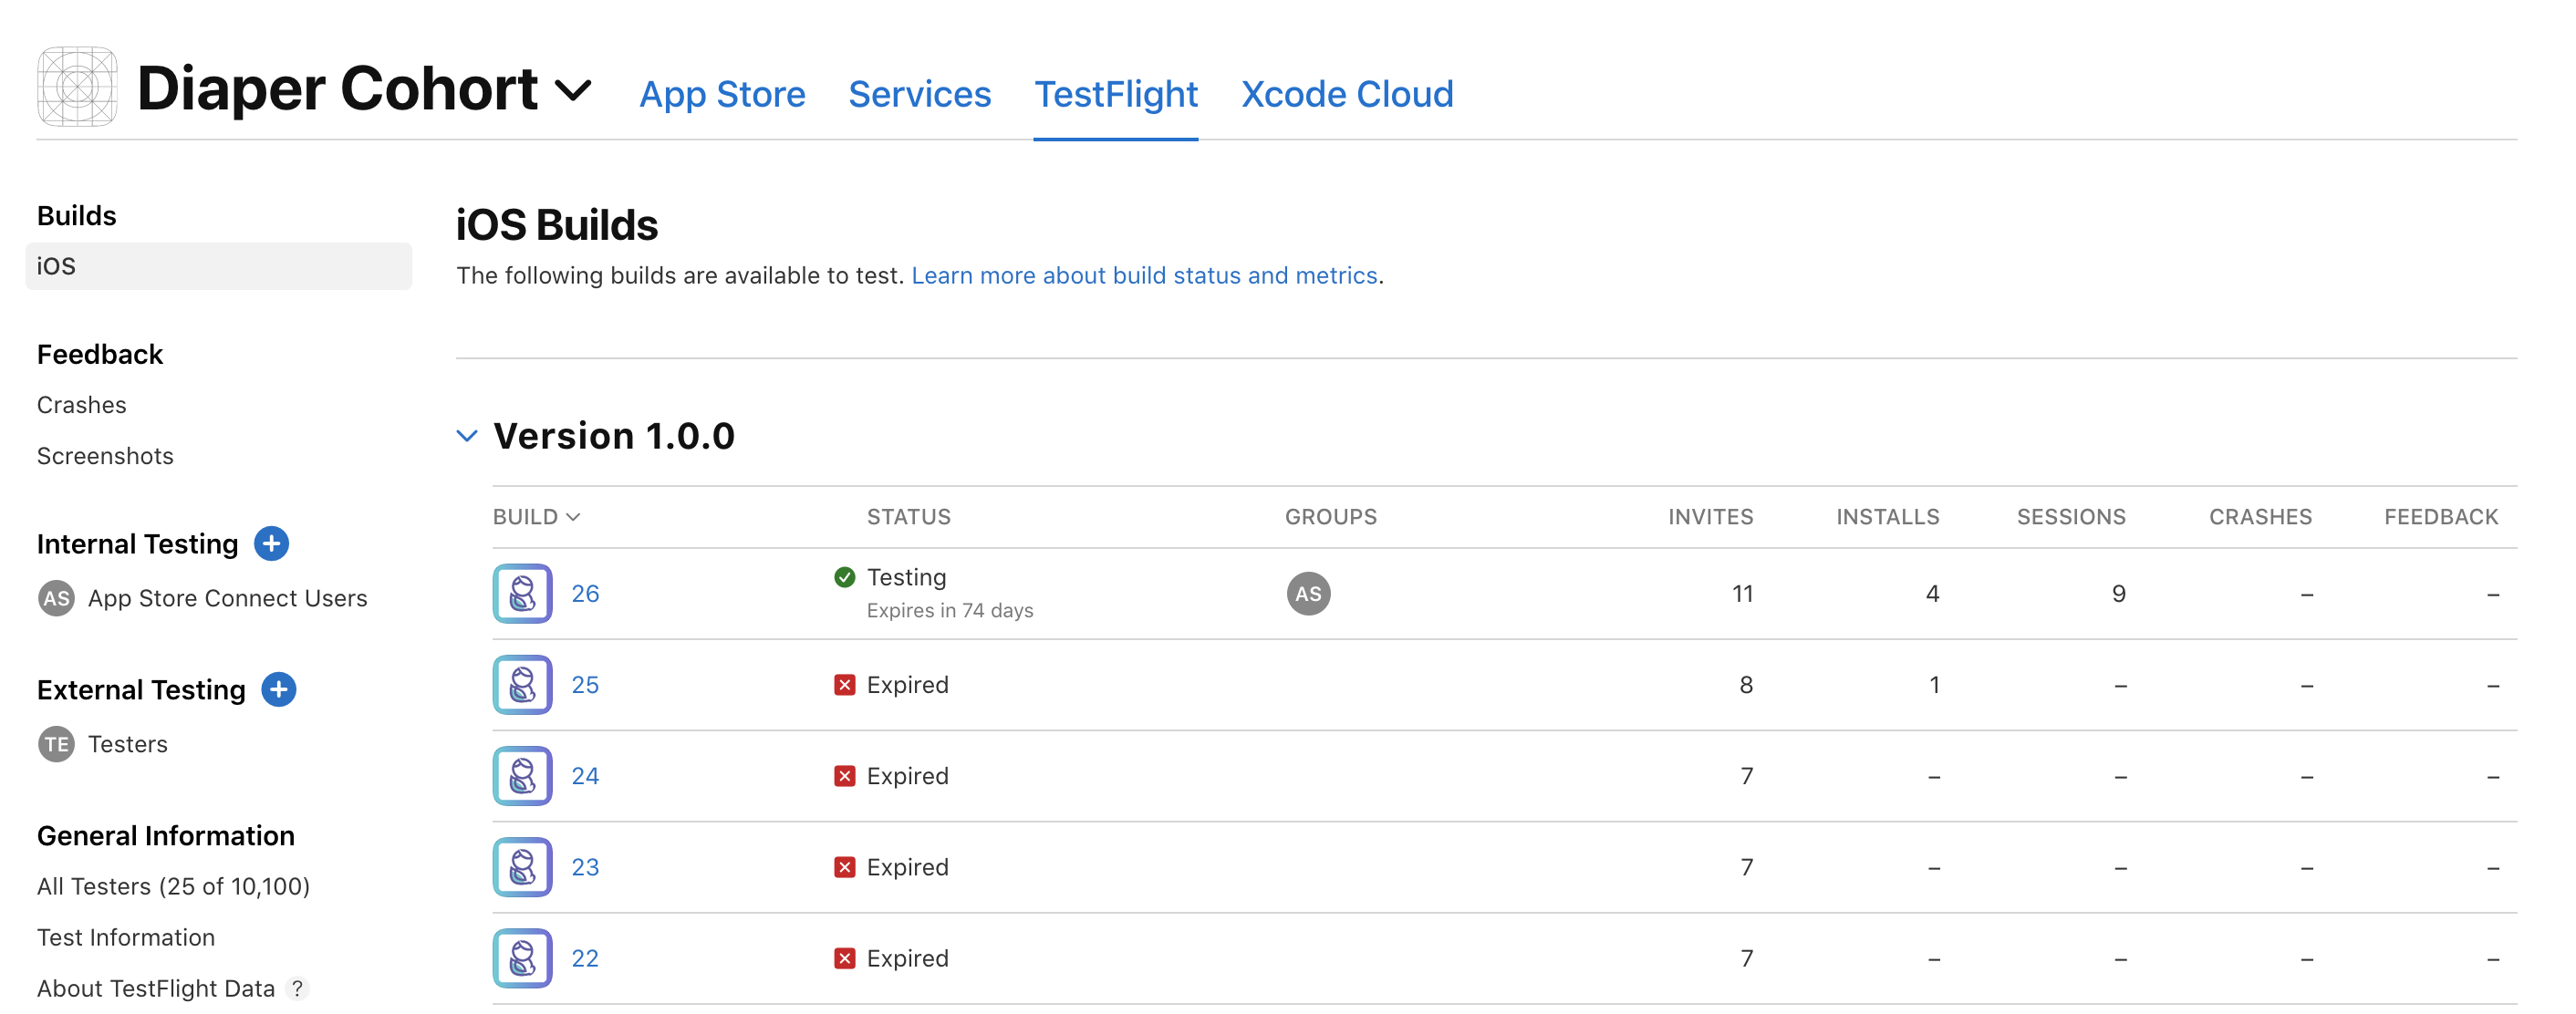
Then, download the app TestFlight from the App store and Redeem Diaper Cohort with the TestFlight invitation code. There, you can play with your most recent build.
📖 Understand the project structure: This initial step ensures you have a clear understanding of the existing codebase, project architecture, and dependencies, which is crucial for effective implementation.
🎨 Implement the feature: You focus on developing the new feature, following best practices, and ensuring it meets the project's requirements and specifications.
🏭 Reconstruct the implementations to achieve scalability and readability by decoupling the UI and Logic: After the implementation, refactor the code to separate the user interface (UI) from the business logic. This decoupling enhances code maintainability, scalability, and readability.
🙋 Start a Pull Request & Review request to the admin: Submit your changes through a pull request, inviting the project admin and team members to review your code. This step ensures that your implementation is scrutinized for quality, adherence to standards, and potential issues.
🧰 Fix highlighted issues: Address any feedback or issues raised during the code review. This collaborative process helps to catch bugs, improve code quality, and ensure the feature integrates smoothly with the existing codebase.
✅ Merge: Once all issues are resolved and the code review is approved, merge your changes into the main codebase. This final step deploys your feature and makes it available for use in the project.
...
