*** This version of Confluence is for testing only and contains a copy of content from June 29th 2026. No changes will be preserved. ***

Scope: To print labels to be affixed to media and objects, including museum items and A/V materials. All archival processing staff.
Contact: Processing archivist, Kaitlyn Bloomquist
Unit: ATS/RMC
Date last updated: March 2025
Date of next review: March 2026
...
Printing labels
Download the correct label template (see the code on the cover of the label box, ex. S-16987) from the Ulinewebsiteas a word document.
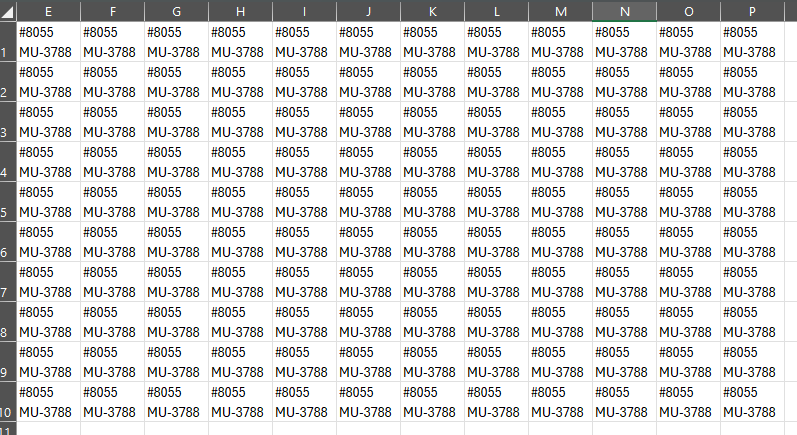
Once you have the correct template downloaded, open it in a word document as well as a blank excel spreadsheet. In the first cell, type in the collection number, then using alt-enter, type in the item number, so that you will have both numbers within the same cell one below the other. Each label should look like this:

In cases where you need two labels for each object (e.g. for CDs/DVDs and other items where both the physical media and the case it is in need a label), create two columns for each number. Count the number of rows and columns on the template (in the case of the S-16987, it is 10 vertical x 16 horizontal) and create the same number of corresponding rows and columns in the spreadsheet, with the necessary numbering.
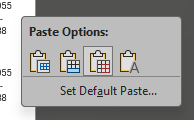
Then, copy and paste the filled columns from the excel spreadsheet to the word document template using the overwrite cells option. Overwrite cells is the third paste option from the left, with the red cells:
Make any necessary corrections to ensure a proper fit (e.g. text direction, line spacing, text size, etc.).
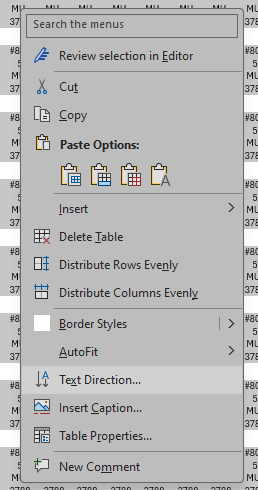
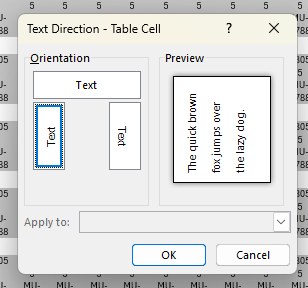
Reorienting Text Direction: The text should be oriented vertically bottom to top to ensure that the labels print properly. To reformat text from horizontal to vertical, select all columns and go to “Text Direction…” in the right-click menu.
The final ready to print label page should look like this:
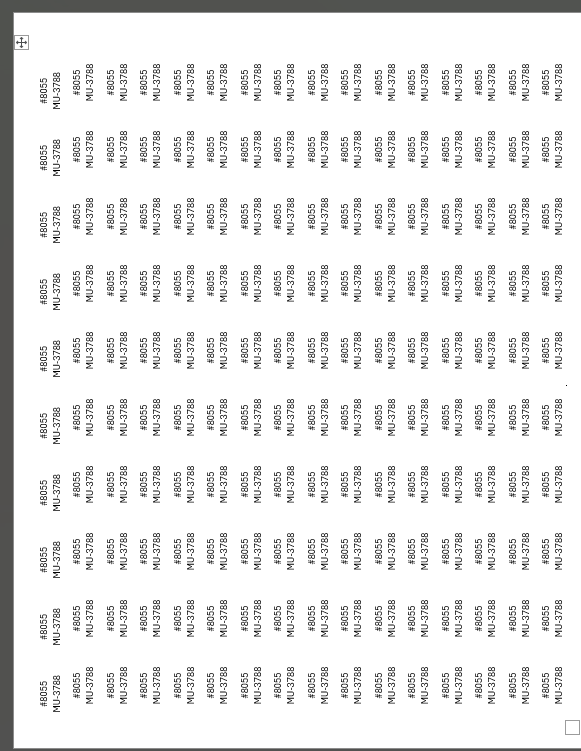
Always make a test print on regular printer paper to be sure that the labels will print correctly. To test that they will fit the label sheet correctly, put the test sheet direction on top of the label paper and hold it up to the light to confirm that each entry fits correctly within the label stickers. If the labels do not align correctly, make any necessary edits and do the test process again until you can confirm that they will print properly.
Once you have confirmed that they will print properly, load the label paper into the printer. Print using the feeder, using the RMC 79 printer. Content by Label
