*** This version of Confluence is for testing only and contains a copy of content from June 29th 2026. No changes will be preserved. ***

...
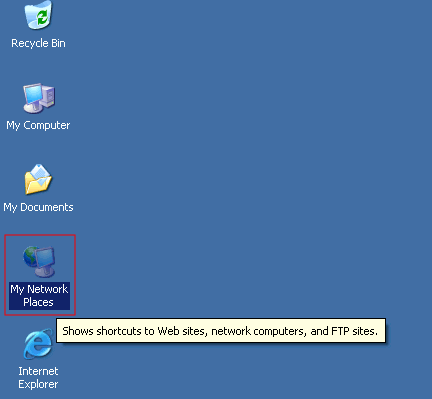
If you have My Network Places on your desktop, double click the icon to open it.
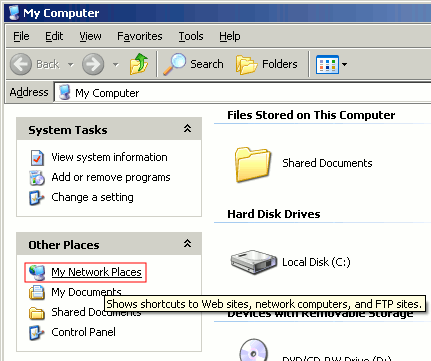
If My Network Places is not on your desktop, open My Computer, and open My Network Places from the sidebar on the left hand side.
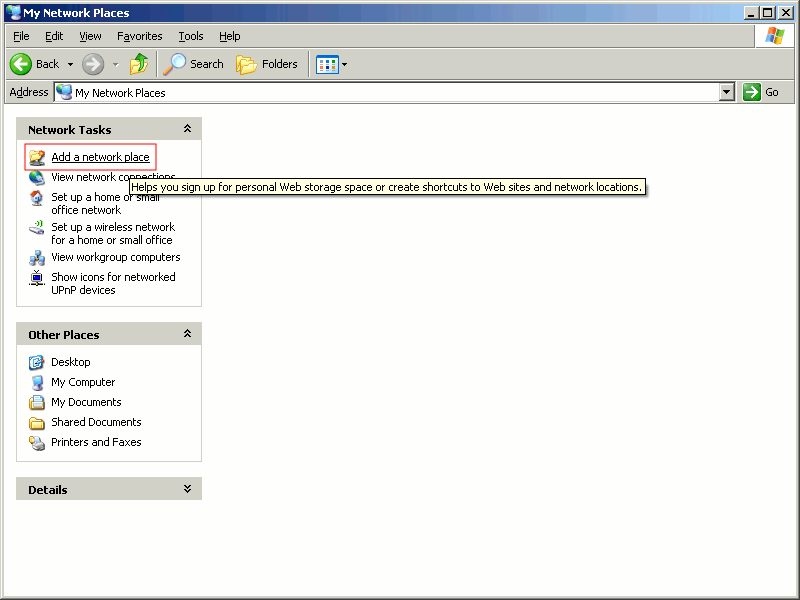
Click on "Add a Network Place" to add a new WebDAV share.
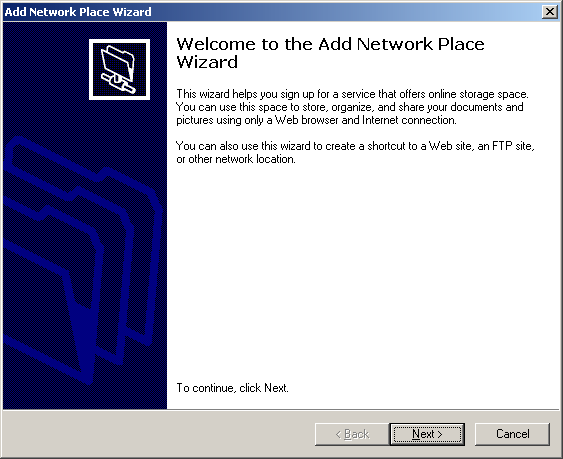
Click Next to continue.
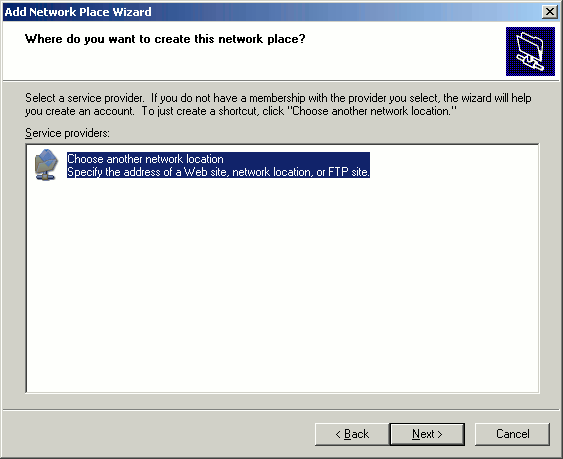
If you have multiple options, be sure to choose the "Choose another network location (Specify the address of a Web site, network location, or FTP site." option.
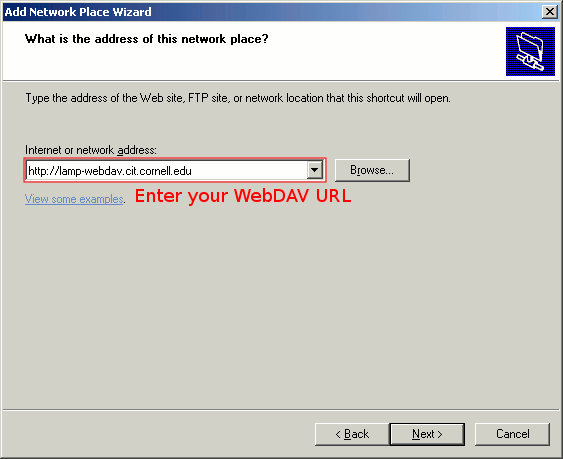
Here is where you enter the WebDAV URL you were provided at signup. This information is also available on the default splash page for your instance. It is usually just your instance's pre-production URL suffixed by -webdav, for example, http://lamp-webdav.cit.cornell.edu .
.
You can visit your LAMP splash page and get this information from the Instructions for Using WebDAV area if you aren't sure.
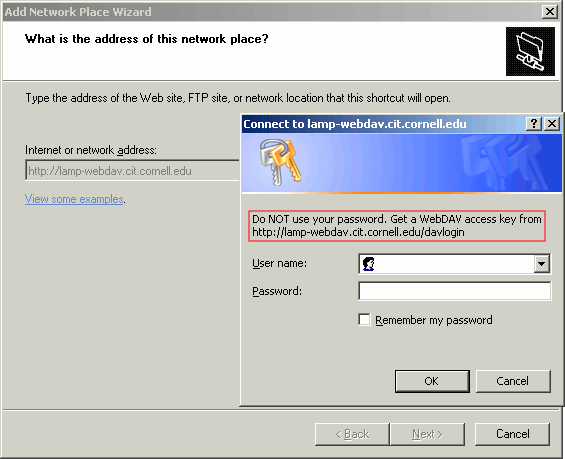
When you click next, you will be prompted for your NetID and your password, in this case your LAMP WebDAV key. Do not use your NetID password.
You can acquire your LAMP WebDAV key from the "davlogin" path at your WebDAV URL, which will be displayed in your authentication prompt, and is also available as a link from your splash page:

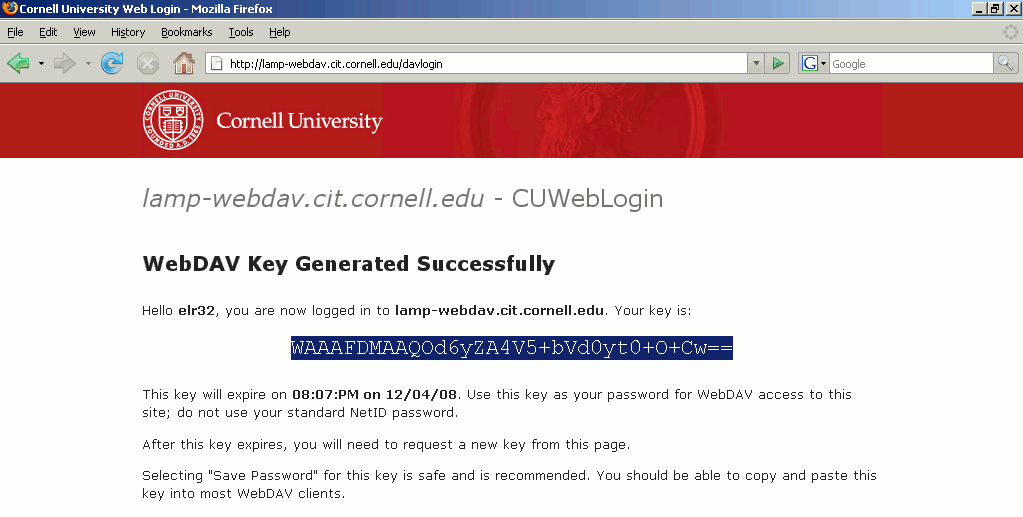
After you visit your WebDAV's DavLogin URL, you will be provided with a long string that is your key. Select the key and copy it onto your clipboard.
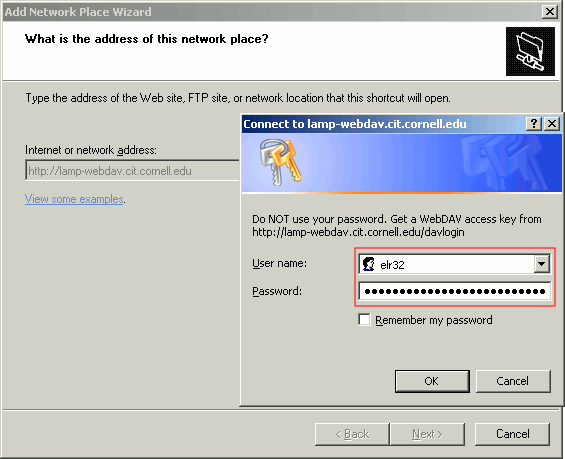
Enter your NetID in the User name field and the DAV key you just acquired into the password field, and click OK, then Next.
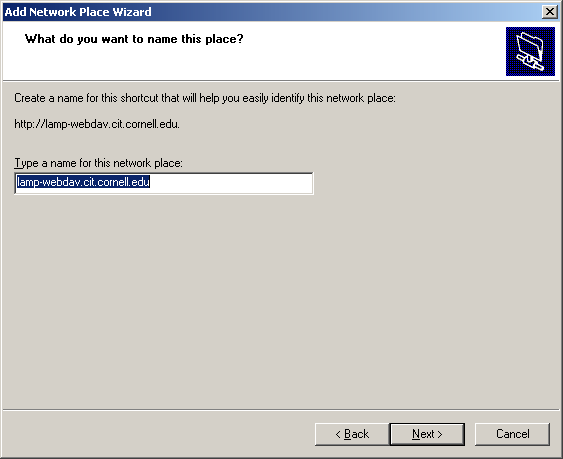
You can name your share whatever you like, the URL for it is already stored.
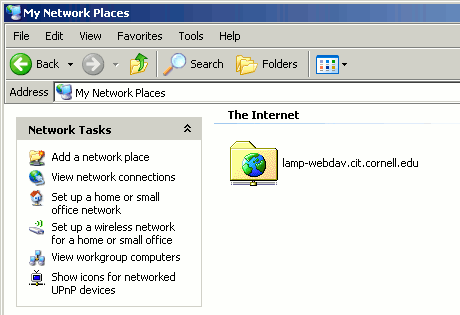
You can now open your DAV share just like it was any other Windows folder from your My Network Places screen. You can now drag and drop files to your LAMP account via DAV and interact with it as if it were a folder on your local machine. The first time you log in, you may be reprompted for your NetID and DAV key - just paste the key in again. Feel free to save the password - you will be prompted again when your key expires.
WebDAV keys are good for 8 hours (they are your CU Web Login session). If you have checked the "Save Password" option, you will be reprompted automatically when it is time to refresh your CU Web Login session. To continue using the share, simply repeat Step 7 and paste the new key into the authentication prompt's password field.
