 Sign-up for free online course on ANSYS simulations!
Problem Specification
1. Create Geometry in GAMBIT
2. Mesh Geometry in GAMBIT
3. Specify Boundary Types in GAMBIT
4. Set Up Problem in FLUENT
5. Solve
6. Analyze Results
7. Refine Mesh
Problem 1
Step 4: Set Up Problem in FLUENT
If you have skipped the previous mesh generation steps 1-3, you can download the mesh by right-clicking on this link. Save the file as pipe100x30.msh. You can then proceed with the flow solution steps below.
Launch FLUENT
Lab Apps > FLUENT 6.3.26
Select 2ddp (2D, double-precision version) from the list of options and click Run.
Import File
Main Menu > File > Read > Case...
...
Also, take a look under zones. We can see the four zones inlet, outlet, wall, and that we defined in centerline GAMBIT.
Grid
First, we check the grid to make sure that there are no errors.
...
Close the Grid Display Window when you are done.
Define Solver Properties
Main Menu > Define > Models > Solver
...
Change Density to 1.0 and Viscosity to *2e-5. These are the values in the Problem Specification. We'll take both as constant.
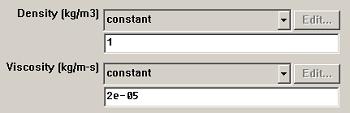
Click Change/Create.
Define Operating Conditions
Main Menu > Define > Operating Conditions...
...
Click Cancel to leave the default in place.
Define Boundary Conditions
We'll now set the value of the velocity at the inlet and pressure at the outlet.
...