 Sign-up for free online course on ANSYS simulations!
...
We need to change the number of stiffeners in the x-direction. In the input file, look for the line where the value of NSX is specified. Set NSX=3 as shown below and save the input file. 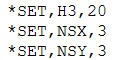
Read Input File
Create a folder called shell2 at a convenient location. Start ANSYS:
...
Enter the location of the folder shell2 that you just created as your Working directory by browsing to it.
Enter shell2 as your Initial jobname. Click on Run.
Resize the ANSYS windows as shown in this snapshot so that you can read instructions in your browser window and implement them in ANSYS.
...
Select the shell_step6.inp file and click OK. ANSYS will run through the commands in shell_step6.inp i.e. repeat steps 1-6 with NSX=3.
...
Let's check what BC's have been applied.
Utility Menu > Plot > Areas
Utility Menu > PlotCtrls > Symbols
Symbols menu: For Boundary condition symbol, select All Applied BCs. For Surface Load Symbols, select Pressures and under Show pres and convect as, select Arrows. Click OK.
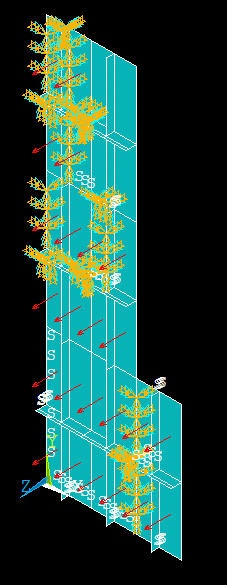
We see that the symmetry and clamped BC's haven't been applied at the correct locations. The pressure has been applied only over part of the facesheet. We'll fix these mistakes below.
...
Recall that originally we made two copies of subsection ABCD. Now we are making three copies of ABCD. However, the input file still insists on making only two copies; this is inherited from the original case. Let's dig a little further into this mystery and see how we can solve it.
...