*** This version of Confluence is for testing only and contains a copy of content from June 29th 2026. No changes will be preserved. ***

| Table of Contents |
|---|
You will only have to do this if you need to create a new calendar that will be tied to a loan policy. To add new calendar ranges please see "".
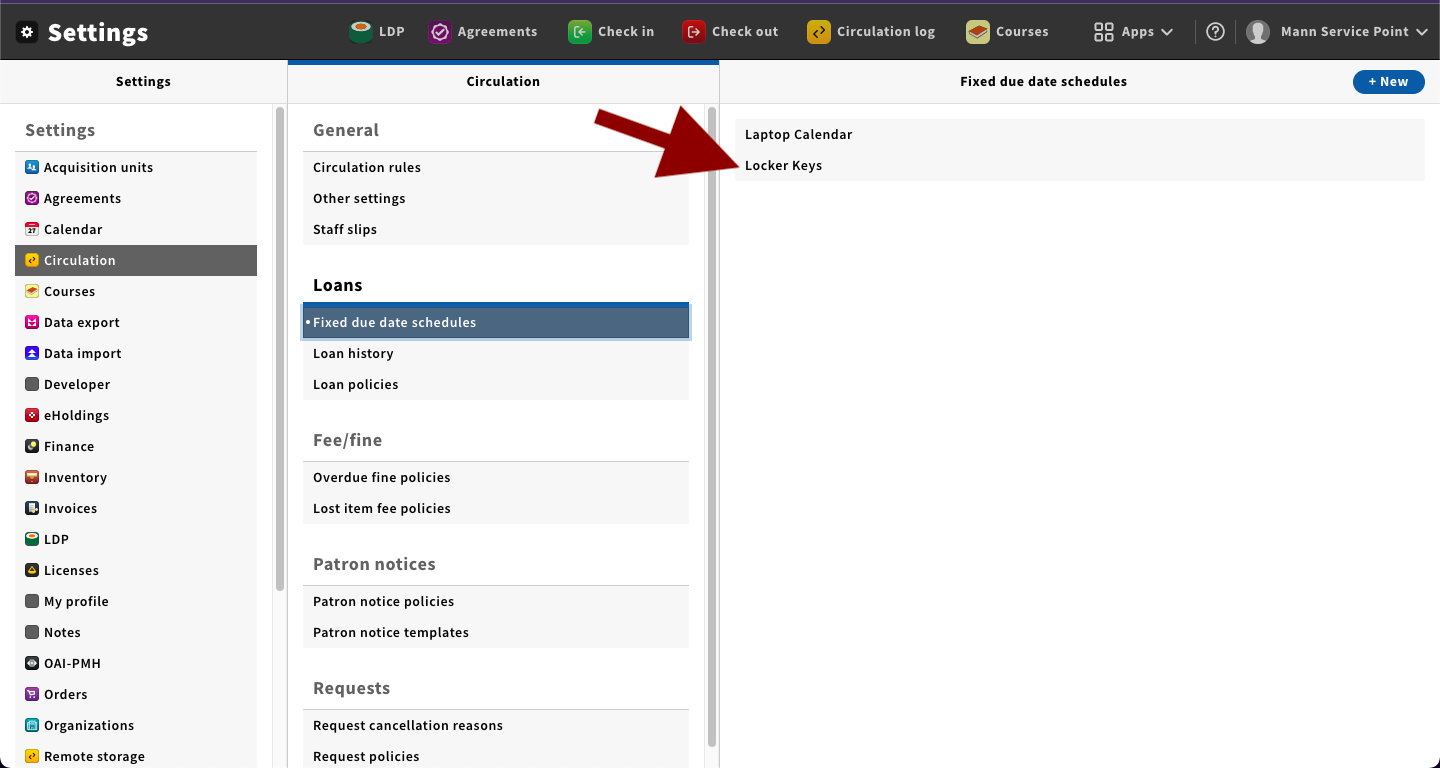
In the Settings App select Circulation, Fixed due date schedules from the menu. Click on New located in the upper right hand corner for the last panel.
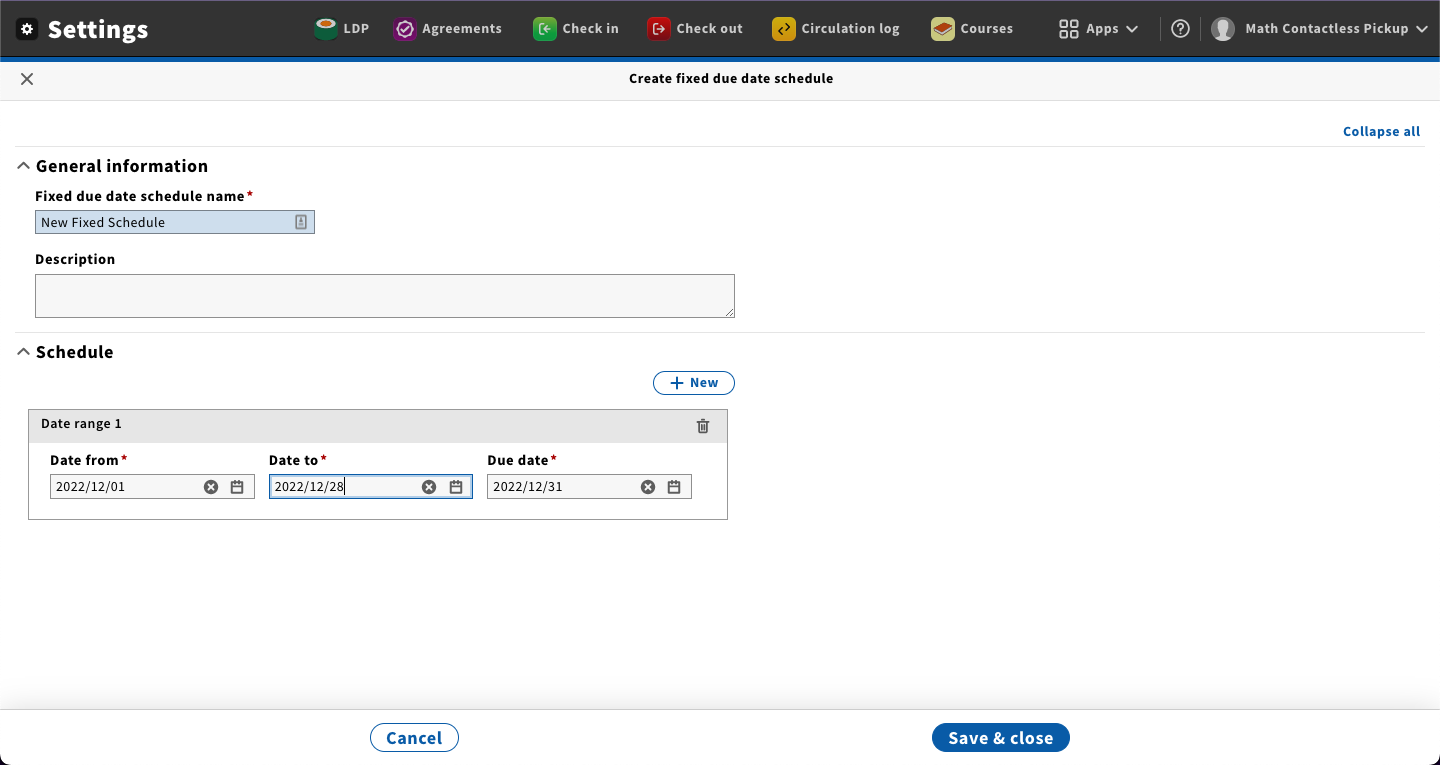
Enter a name for the new Fixed due date schedule. Enter a Start date, End date and Due date for the schedule. Click on Save & close to add the new Fixed due date schedule.
NOTE:
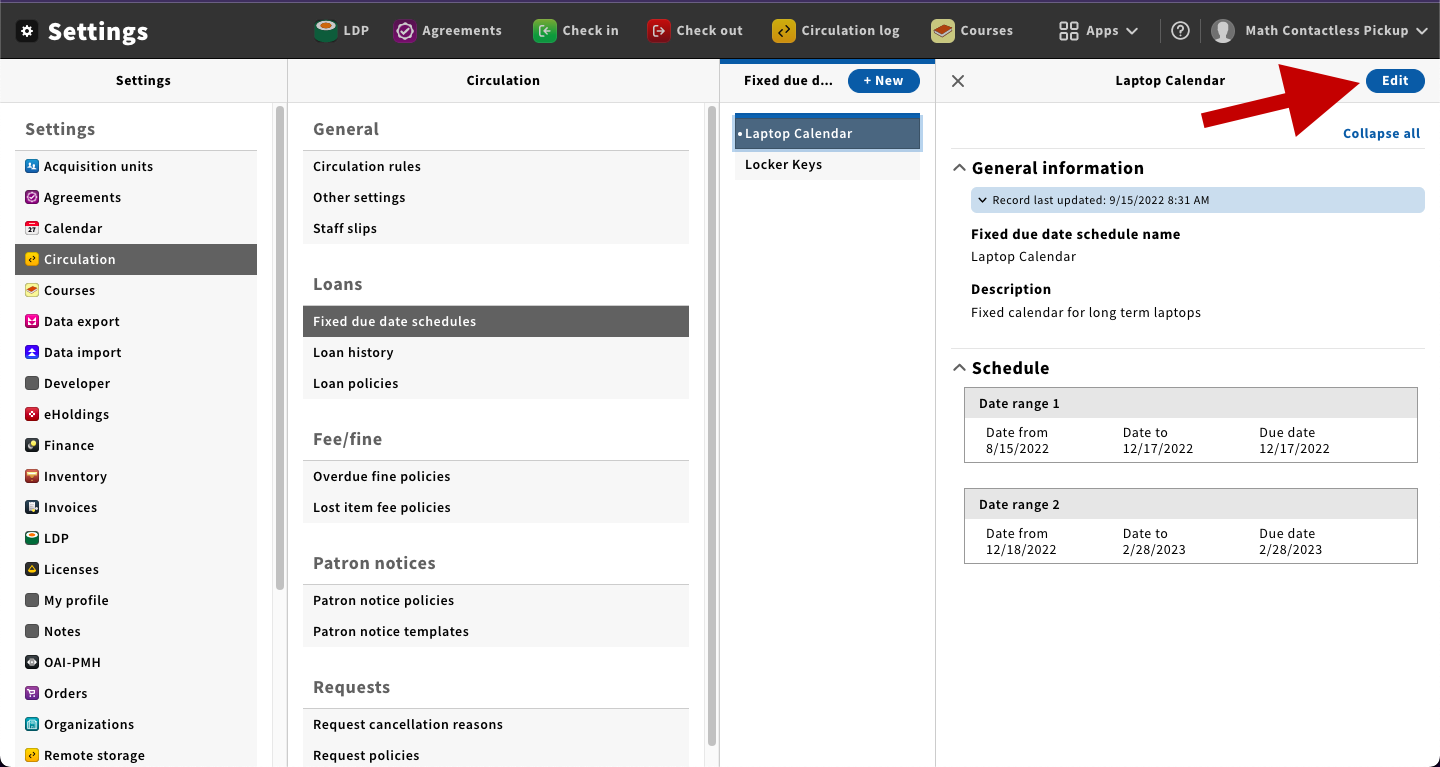
In the Settings App select Circulation, Fixed due date schedules from the menu. Click on the calendar you wish to modify to open its details panel; click on the Edit button located in the upper right hand corner of the panel.
Click on the New button to add a blank calendar period; the blank date range will be added to the bottom of the list.
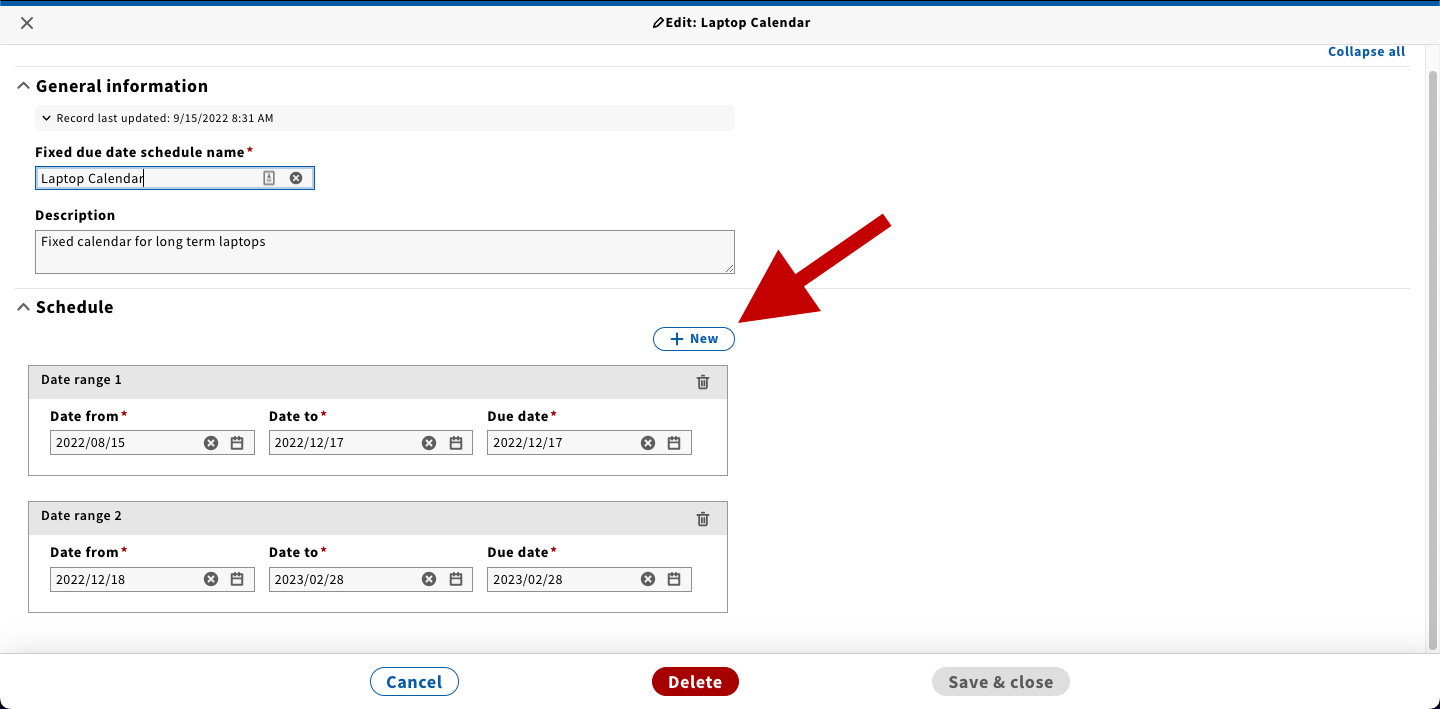
Enter a Start date, End date and Due date for the schedule.
NOTE:
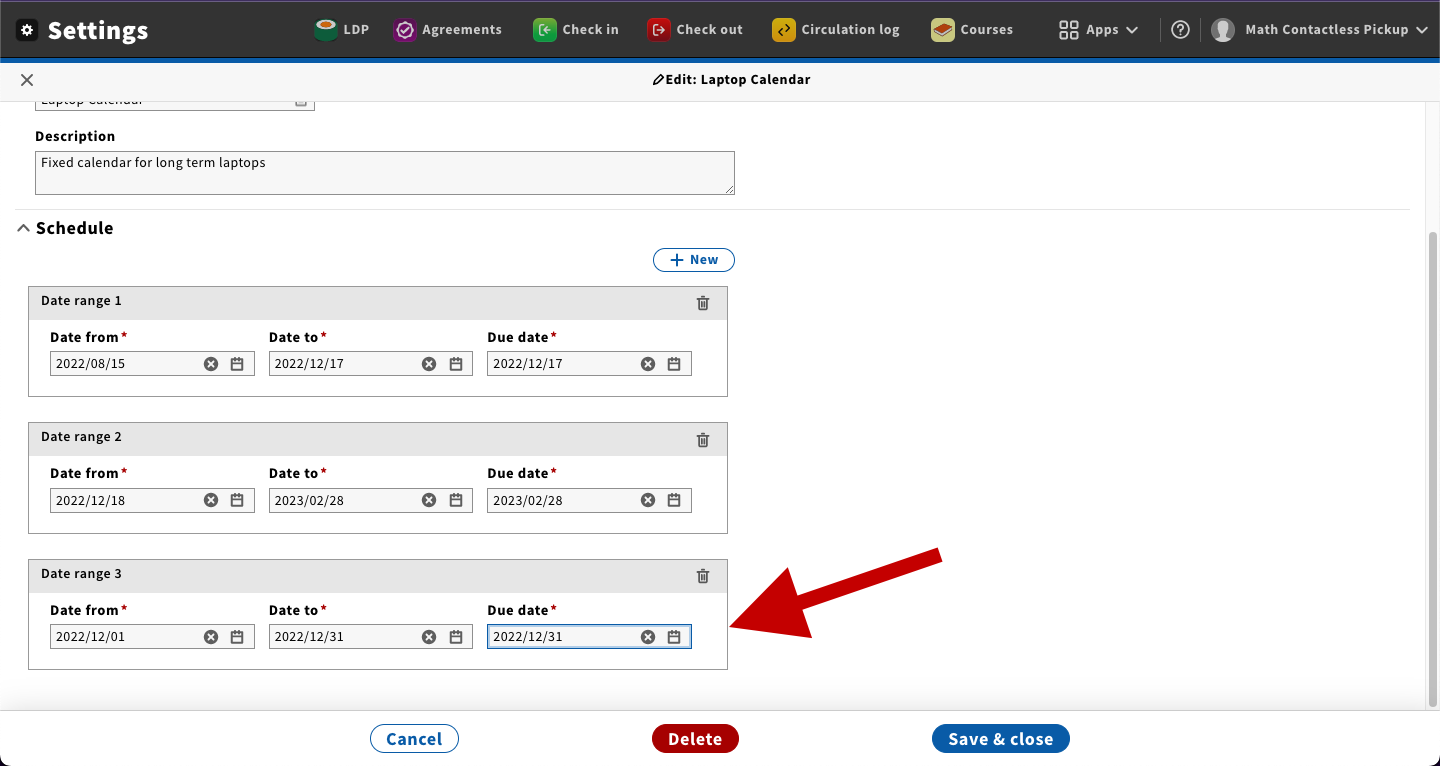
Click on Save & close.
In the Settings App select Circulation, Fixed due date schedules from the menu. Click on the calendar you wish to modify to open its details panel; click on the Edit button located in the upper right hand corner of the panel.
Locate the date range you wish to modify. Update the Start date, End date and Due date to the desired values.
Click on Save & close.
In the Settings App select Circulation, Fixed due date schedules from the menu. Click on the calendar you wish to modify to open its details panel; click on the Edit button located in the upper right hand corner of the panel.
Click on the trash can in the corresponding date range you wish to remove.
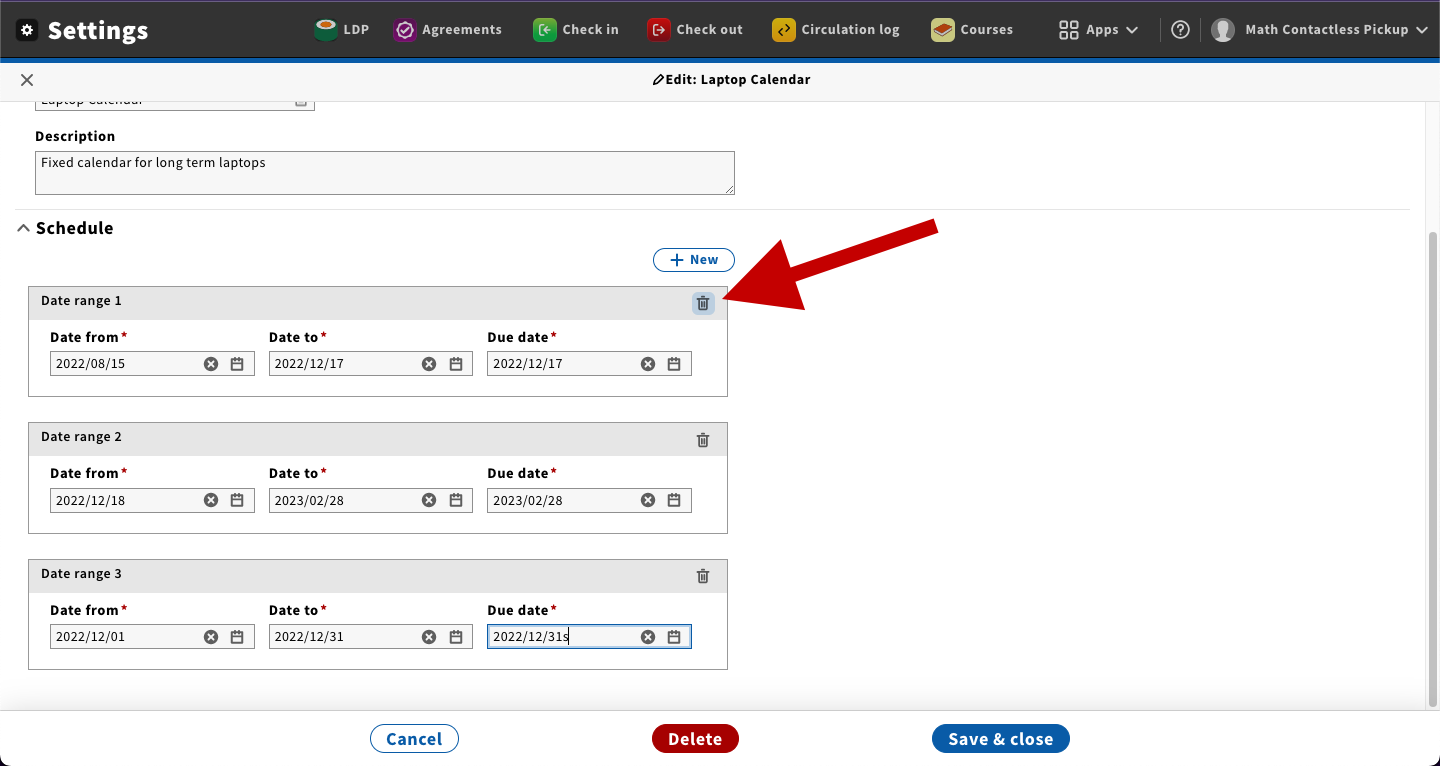
Note: Do not remove an active date range as this may cause issues in the system.
Click on Save & close.