*** This version of Confluence is for testing only and contains a copy of content from June 29th 2026. No changes will be preserved. ***

...

8. Upload a copy of the invoice and any approval information by dragging them to the box under Links & documents or select or choose file.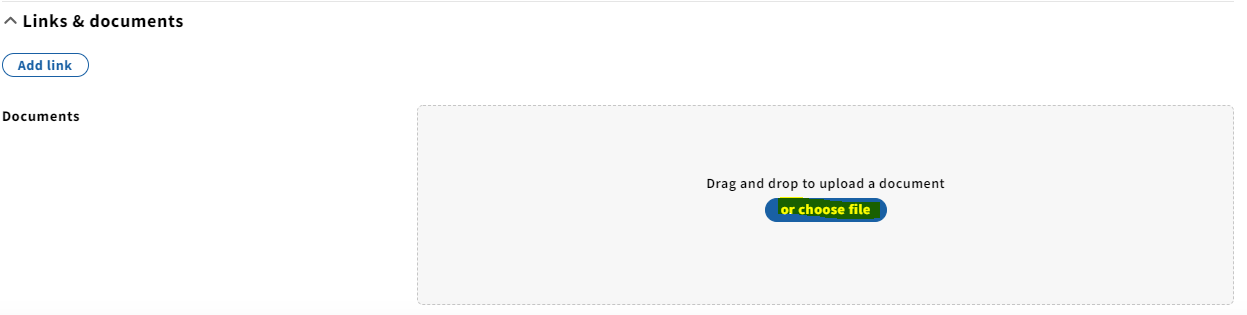
9. Click Save & close at the bottom.
10. Select Add under Invoice lines.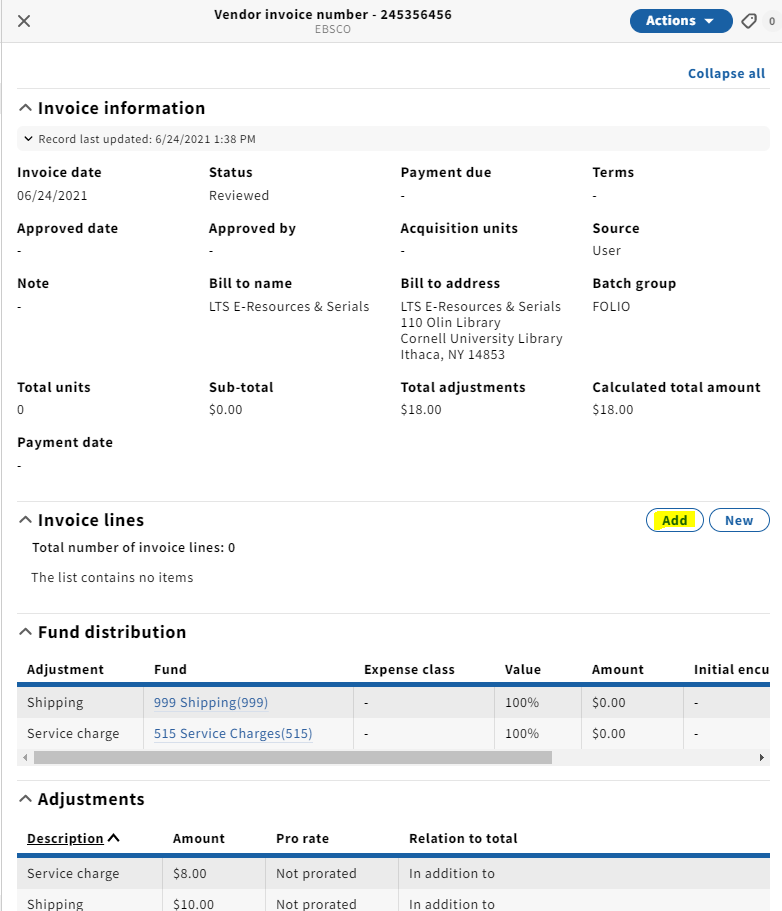
11. A pop-up will appear where you can search for an order line by title or PO#. After you've identified the order line, click the checkbox next to the PO# and click Save.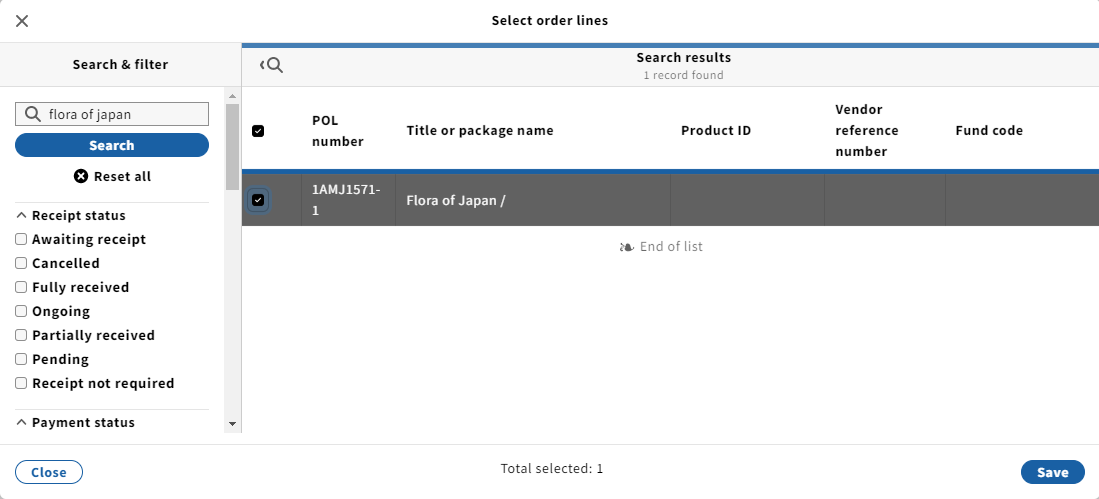
12. The Invoice lines field will now be populated with the title you just selected. Next, click on the invoice line.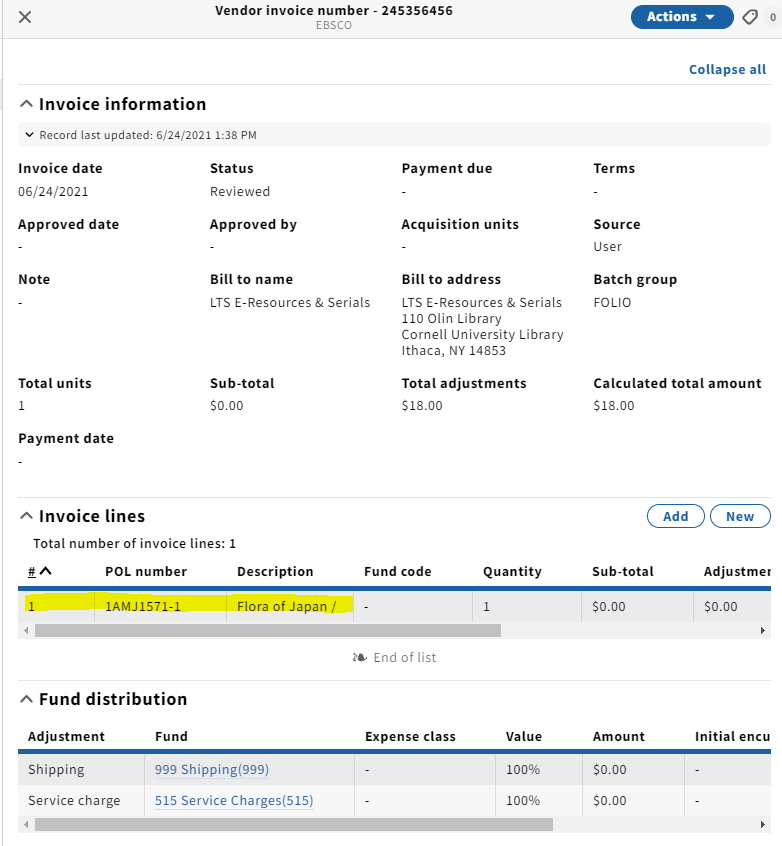
13. Select Edit from the Actions drop-down menu.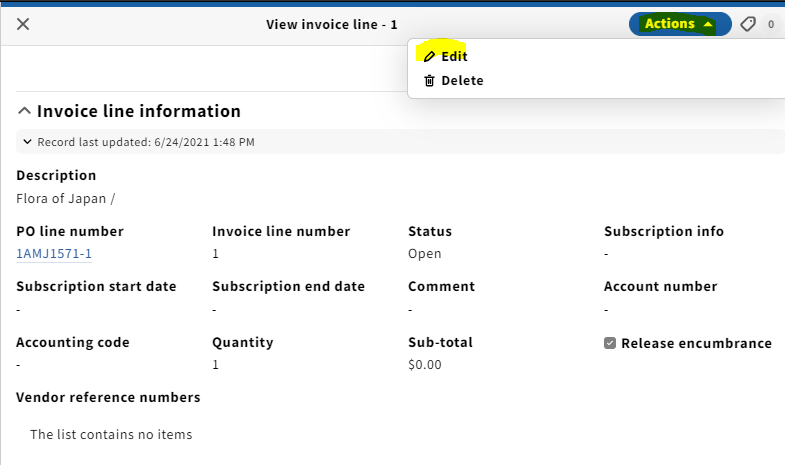
14. On the Invoice line information edit screen, fill in the following information:
- Subscription info: P for print, E for electronic, P+E for both
- Subscription start and end dates
- Comment: fill in volume or enumeration info in this field
- Sub-total: the cost of that particular line item (as stated above, if this is a single-line invoice, you will include shipping in this field similar to our practice in Voyager)
- Fund distribution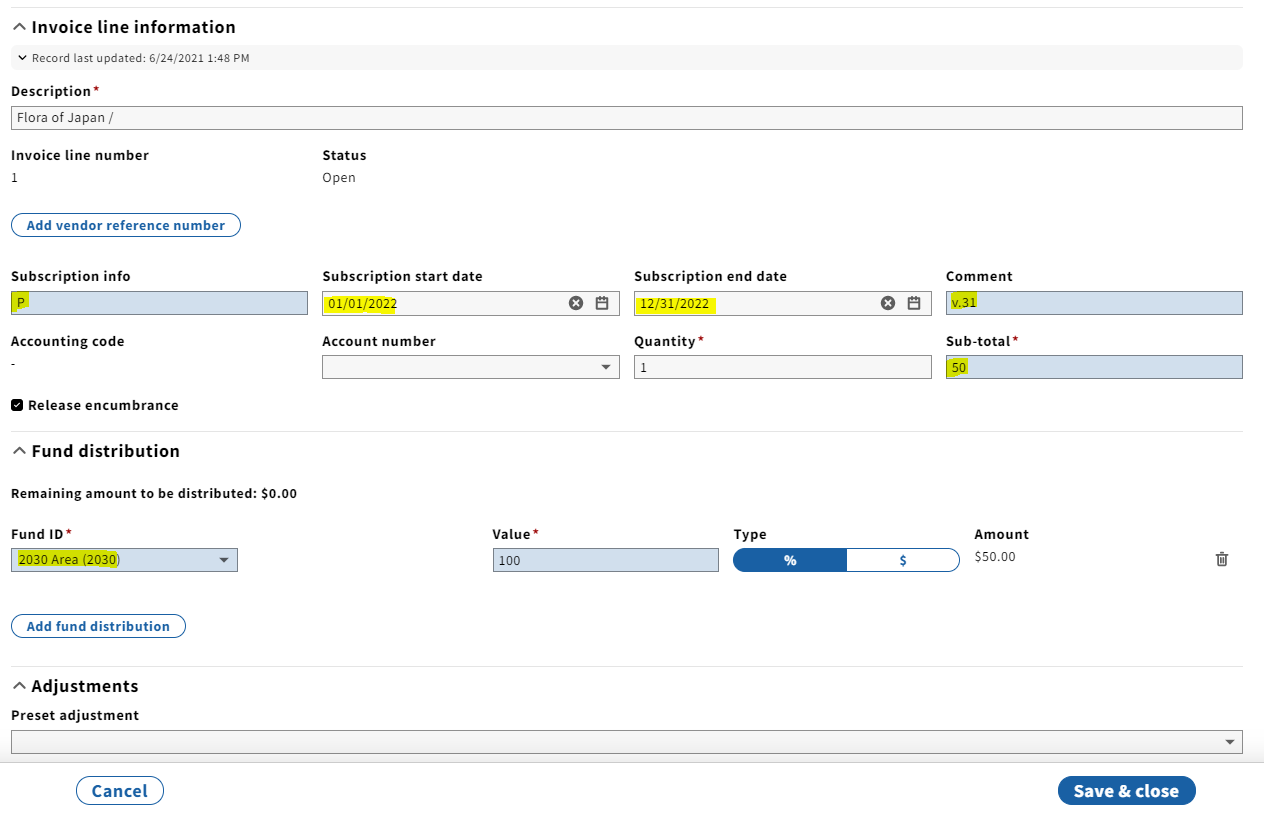
15. Click Save & close.
16. If adding more invoice lines, repeat steps 10-15 for each item.
17. Note that when you pay for an e-resource, you will be selecting Electronic Resource - perpetual under Expense class in Fund distribution. This replaces the -01 suffix that we used in Voyager.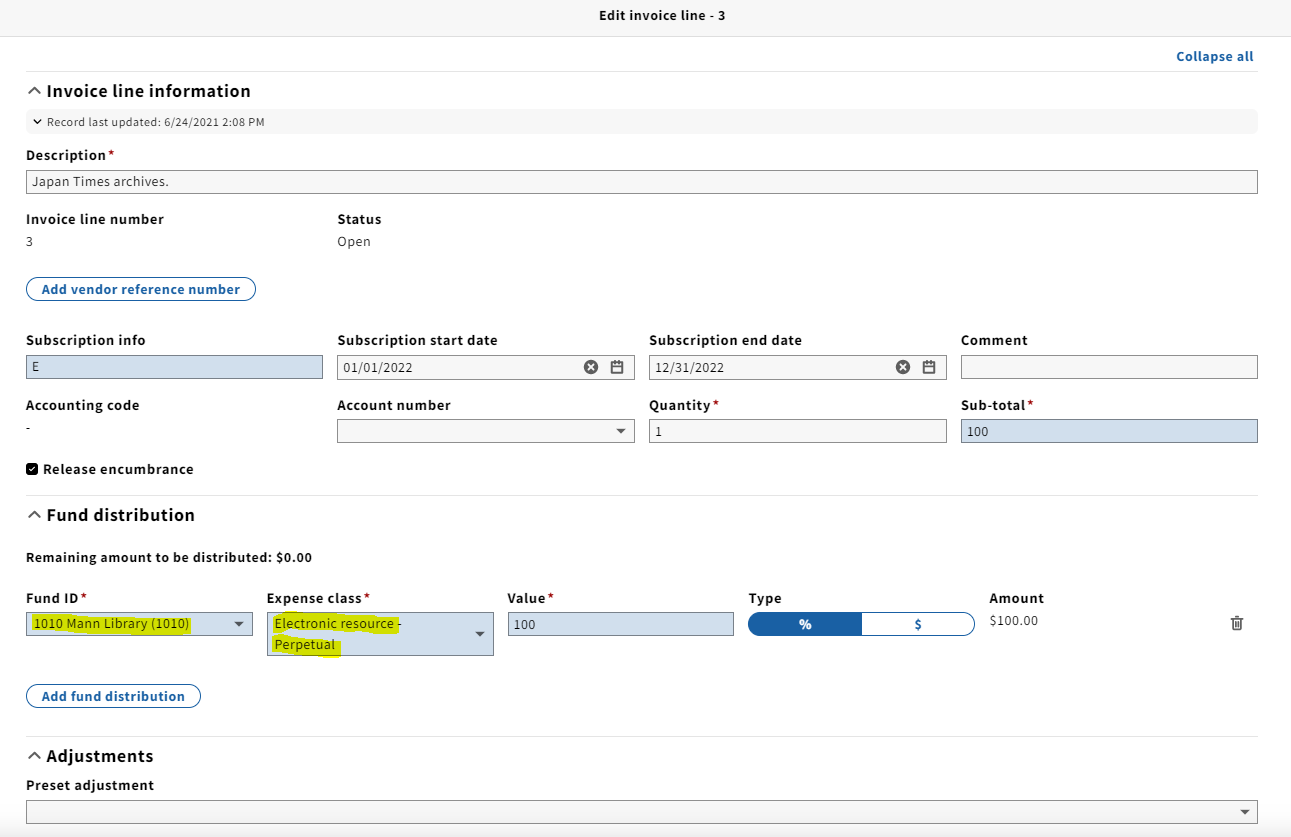
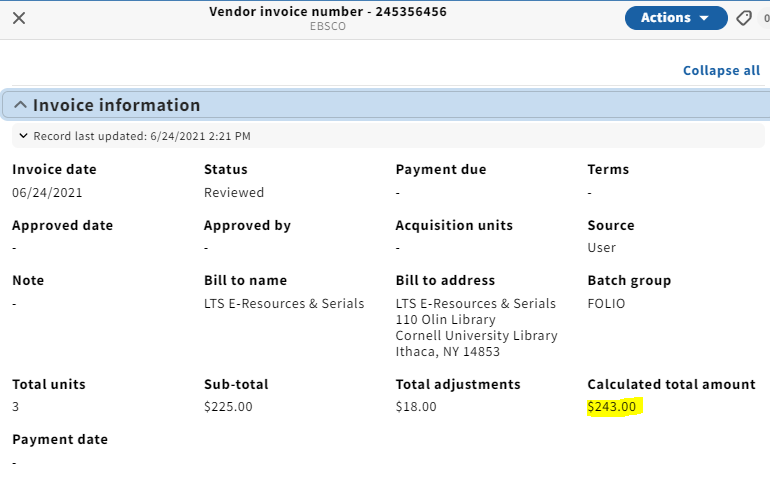
18. Double-check to make sure that the Calculated total amount matches the total on the invoice.