*** This version of Confluence is for testing only and contains a copy of content from June 29th 2026. No changes will be preserved. ***

...
Git is a ‘free and open source distributed version control system’.
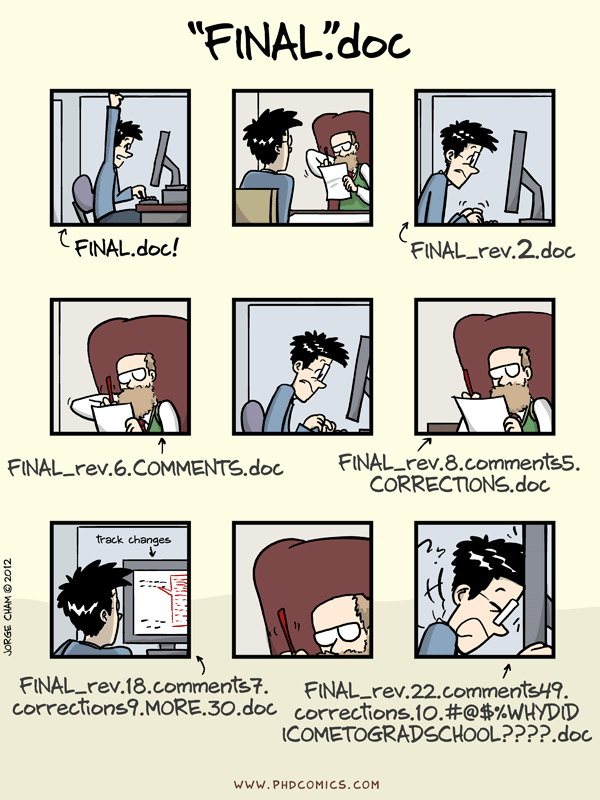
Many of us will have had an experience similar to thisReplace the draft document with metadata. We are working on a dataset and we attempt to maintain multiple versions of this data, all at different stages of completeness, many of which may have comments, suggestions or other forms of input from other people.
...
We often hear the terms Git and GitHub used interchangeably but they are slightly different things. Git refers to the software and principles used for a particular flavour of version control system, also called VCS in short (there are other systems such as Mercurial and SVN). GitHub is a popular Web site which hosts Git repositories. The majority of the content that GitHub hosts is open source software, though increasingly it is being used for other projects such as open access journals, blogs, and constantly updated text books. GitHub is a great place to learn how to use Git but once you have learned the ideas and processes behind GitHub you can use Git on other storage systems. You can even host repositories on your own server or computer if you want to keep your files private or if you wanted to encrypt your repository. You can get private repositories on GitHub for a fee. Gitlab is an open source Git repository management and hosting software. You can host it on your own server and configure with unlimited private repositories.
One of the main barriers to getting started with Git is the language. Although some of the language used in Git is fairly self-explanatory, other terms are not so clear. The best way to get to learn Git language - which consists of a number of verbs, or commands, e.g. add, commit, preceded by the word Git - is by using it but having an overview of the language and the way Git is used will provide a good starting point.
...
We can see that one file changed and we made one insertion which was our ‘hello world’. We have now recorded our changes and we can later go back and see when we made changes to our file and decided to add ‘hello world’. We do have a problem now though. At the moment our changes are only recorded on our computer. At the moment, if we wanted to work with someone else, they would have no way of seeing what we’ve done. Let’s fix that. Let’s jump to the GitHub website where we could decide to host some of our work. Hosting here will allow us to share our work with our friends and colleagues but will also allow other people to use or build on our work.
...
When we have logged in to GitHub, we will see an option to create a new repository. Let’s make one for the GitHub experiments we are going to do today.
new repository
give it a name
GitHub will ask you to create README.md, add a license and a
.gitignore file. Do not do any of that for now. Once we have created the new repository, we still need to link the repository we have on our computer with the one we’ve just set up on GitHub.
| Code Block | ||
|---|---|---|
| ||
$ git remote add origin <web address of your repo.git> |
...
This will add a repository on GitHub for our changes to be committed to.
Check that it is set up correctly with the command:
...
| Code Block | ||
|---|---|---|
| ||
$ git remote -v |
...
Then enter:
| Code Block | ||
|---|---|---|
| ||
$ git push -u origin master |
...
git push will add the changes made in our local repository to the repository on GitHub. The nickname of our remote is origin and the default local branch name is master. The -u flag tells Git to remember the parameters, so that next time we can simply run git push and Git will know what to do. Go ahead and push it!
...
You will be prompted to enter your GitHub username and password to complete the command.
...
When we do a git push, we will see Git ‘pushing’ changes upstream to GitHub. Because our file is very small, this won’t take long but if we had made a lot of changes or were adding a very large repository, we might have to wait a little longer. We can get to see where we’re at with git status.
| Code Block | |
|---|---|
|
| |
$ git status On branch master Your branch is up-to-date with 'origin/master'. nothing to commit, working directory clean |
...
This is letting us know where we are working (the master branch). We can also see that we have no changes to commit and everything is in order.
...
We can use git diff to see changes we have made before making a commit. Let’s add another line to our text file.
| Code Block | |
|---|---|
|
...
| |
$ open git_test.txt
$ git |
...
...
diffdiff --git a/git_test.txt b/git_test.txt index 70c379b..1d55e1a 100644 --- a/git_test.txt +++ b/git_test.txt @@ -1 +1,2 @@ -Hello world \ No newline at end of file |
...
+Hello world +More changes to my first github file \ No newline at end of file |
...
We can see the changes we have made.
...
df0654a and 315bf3a are unique computer-generated identifiers for those versions....
We can now commit these changes again:
...
| Code Block | ||
|---|---|---|
|
...
$ git add git_test.txt
$ git commit -m 'second line of changes' |
...
Say we are very forgetful and have already forgotten what we changes we have made. git log allows us to look at what we have been doing to our Git repository (in reverse chronological order, with the very latest changes first).
| Code Block | ||
|---|---|---|
| ||
$ git status
|
...
commit 40d3f7af25e19c06fa839a570d51e38fdb374e80
Author: davanstrien <email@gmail.com>
Date: |
...
Sun Oct 18 15:25:19 2015 +0100 |
...
|
...
second line of changes |
...
commit 27c3f19c3340d930234d592928b11b63403d0696
Author: davanstrien <email@gmail.com>
Date: |
...
Sun Oct 18 13:27:31 2015 +0100 |
...
|
...
|
...
hello world |
...
This shows us the two commits we have made and shows the messages we wrote. It is important to try to use meaningful commit messages when we make changes. This is especially important when we are working with other people who might not be able to guess as easily what our short cryptic messages might mean.
We might get a lit bit lonely working away on our own and want to work with other people. Before we get to that, it is worth learning one more command.
...
We can try to see how this works by making changes on the GitHub website and then ‘pulling’ them back to our computer.
Let’s go to our repository. We can see our txt file and make changes. However, you may have noticed only our first change is there. This is because we didn’t push our last commit yet. This might seem like a mistake in design but it is often useful to make a lot of commits for small changes so you are able to make careful revisions later and you don’t necessarily want to push all these changes one by one.
Let’s go back and push our changes
$ git push
Now if we go back to our GitHub repo, we can see all our changes. Let’s add an extra line of text there, and commit these changes. When we commit changes on GitHub itself, we don’t have to push these.
Now let’s get the third line on to our computer.
$ git pull
remote: Counting objects: 3, done.
remote: Compressing objects: 100% (2/2), done.
remote: Total 3 (delta 0), reused 0 (delta 0), pack-reused 0
Unpacking objects: 100% (3/3), done.
From https://github.com/davanstrien/git_lesson_example
   40d3f7a..ef95e51  master     -> origin/master
Updating 40d3f7a..ef95e51
Fast-forward
 git_test.txt | 3 ++-
 1 file changed, 2 insertions(+), 1 deletion(-)
If we open our text file again
$ open git_test.txt
we can see our new lines.
...
When we begin collaborating on more complex projects, we may have to consider more aspects of Git functionality, but this should be a good start.
...
It is likely that some things won’t have stuck from the last hour. To try to reinforce how things work we can work in groups to develop diagrams to illustrate Git functions and language. This should make carrying out more complicated aspects of Git clearer in our heads.
(Optional) In groups:
...
...
...
In group work, spend some time trying to illustrate some of the commands we’ve used with Git:
...
...
If you want to practise more feel free to keep practicising making changes to your file and committing the changes. If you want to explore more git commands, search for some more online or follow one of the suggested links below.
...