...
- When you request your new Cornell Stack VM be sure to include that you want MySQL installed as well.
- Once you receive your new VM information from Webservices, you'll need to log into the Hosting Dashboard, click on the Servers button, and find the new VM (will be named like "webhost###.serverfarm.cornell.edu).
- Click on the VM name which will take you to the VM status page. About halfway down you should see a link for "Database Admin Page" - if you do not, please contact webservices@cornell.edu to open a ticket to get the MySQL access enabled.
!IMAGE! 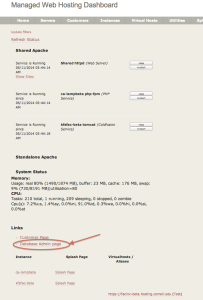 Image Added
 - The next screen should allow you to click the link "Create Database". Take note that the VM name is listed at the top so you know what VM and what MySQL server this will occur on.
- The Create Database link will allow you to:
- Create a database name - no more the 16 characters
- It will also automatically create a user for you
- After you click "Create" button, the screen will come back with the following information:
- Database Name: <what you entered previously>
- Database Host: localhost
- Database User: <default user created for you>
- Database password: <password created for you>
- You can now go to phpMyAdmin from your Instance Splash page and login to the MySQL server and use your new database.
...
{"serverDuration": 71, "requestCorrelationId": "5de9b9b5b5b6edcc"}

