 Sign-up for free online course on ANSYS simulations!
...
Step 2: Mesh Geometry in GAMBIT
Mesh
...
Edges
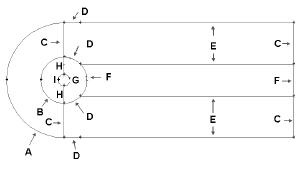
We will mesh each of the 2 faces separately to get our final mesh. Before we mesh a the face, we need mesh the edges to better define the point of distribution for each of the edges that form the face.We will use the default setting for meshing of the edge.our mesh.
Following figure shows the edges with different mesh properties.
(Click picture for larger image)
Operation Toolpad > Mesh Command Button  > Edge Command Button **Button
  *> Mesh Edges*
Select the edge AB. The edge will change color and an arrow will appear on the edge. This indicates that you are ready to mesh this edge. Select interval size under Spacing. Enter 0.04 for interval size.
...
Operation Toolpad > Mesh Command Button  > Face Command Button
  > Mesh Faces
Select the face1. The face will change color. You can use the defaults of Quad (i.e. quadrilaterals) and Map. Click Apply.
...